See an example of how to combine SAP NetWeaver BW data with data coming from almost any RSS feed. You can display the data inside SAP Web Application Designer without having to upload it into SAP NetWeaver BW, which gives the user the ability to display online information side-by-side with internal data coming from SAP NetWeaver BW.
Key Concept
RSS feeds have become very common. Many Web sites offer them as a service to keep track of what's new in the site – for example, RSS feeds for stock prices or traffic information in a specific area. You can display the feed in your Web Application Designer (WAD) screen along with your regular BW reports. You use basic HTML elements, such as a marquee tag and a li tag, along with JavaScript to consume the RSS feed and design it to feed a Web template created in WAD.
Here I give a step-by-step procedure to show how to consume RSS feeds and display them in a Web Application Designer (WAD) template along with other data coming from your SAP NetWeaver BW system. You can add data coming from any RSS feed to any template without having to actually load the data into your BW servers.
Many business scenarios can benefit from such a solution (e.g., stock information together with internal financial data from SAP NetWeaver BW or traffic reports from RSS together with internal shipments data from SAP NetWeaver BW).
As an example, I use an RSS feed on a NASDAQ site to show quotes for the following symbols: SAP, ORCL (Oracle), MSFT (Microsoft), and APPL (Apple). NASDAQ has no real connection to the data coming from the SAP NetWeaver BW query in my example, but instead simply illustrates the ability to display any RSS feed together with any query data.
The RSS URL that I use is https://tinyurl.com/c5nn4aj.
To start, I create a simple SAP NetWeaver BW query that shows a list of countries (Code + description), which I chose because it’s a simple query over data that almost every company has. You can choose your own query. As you can see in Figure 1, my query just returns a list of country codes and names from the SAP NetWeaver BW system.
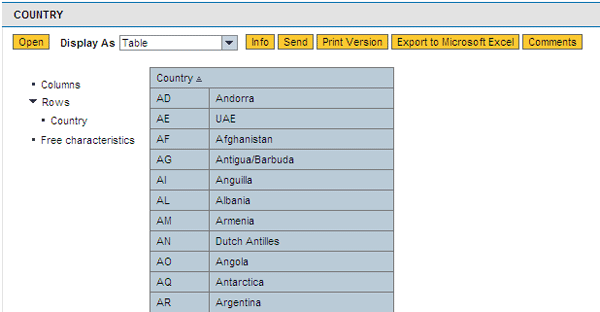
Figure 1
BEx query COUNTRY
Next, I build my Web template. I use WAD version 7 to start with a blank new Web template (Figure 2), and then insert a simple HTML table. I do this by clicking the insert table icon  from the icon list at the top of the Web template.
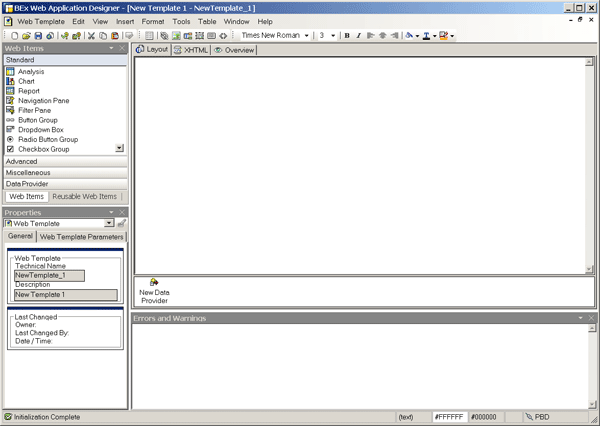
Figure 2
A blank Web template
This takes you to the screen shown in Figure 3, in which you should choose the table to be two rows and two columns for my example. When building your own template, you can use as many rows or columns as you wish.

Figure 3
HTML table properties screen
Next, I merge the two columns in the first row into one cell. To do that, I insert some spaces in both cells and select the content of them as shown in Figure 4. Enter the spaces by hitting the spacebar, and select the text by dragging the mouse with the left mouse button clicked.

Figure 4
Merge two cells in an HTML table
Then, from the Table menu item at the top of the screen, choose Merge Cells (Figure 5).
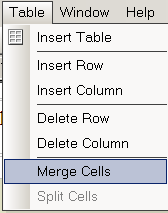
Figure 5
Click Table and then select Merge Cells
You get a warning screen saying the content of the second cell is going to be eliminated by the merge (Figure 6). Click the Yes button.
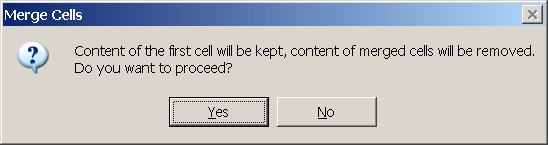
Figure 6
Merge cells warning
By now, your table should look like Figure 7.

Figure 7
An HTML table after a merge
Now I connect my query to Data Provider 1 (DP_1). To do that, click the New Data Provider button on the bottom of the design screen. Figure 7 shows a piece of the design screen. You can see the full screen in Figure 2.
That brings me to the screen shown in Figure 8. Enter your query name, which in my example is ZCOUNTRY. You can also select it from the query list by clicking the select a query icon  next to the query name.
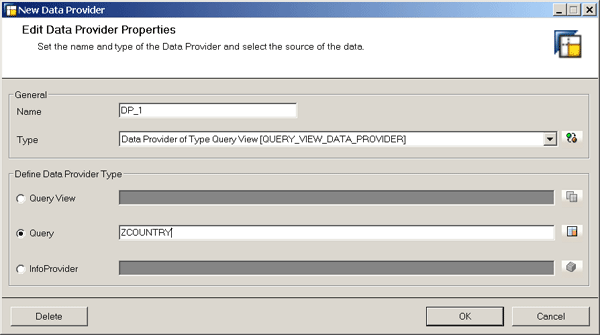
Figure 8
Connecting a query as a data provider
Now I add a simple Analysis Web item from the Web item list on the left side of the design screen (Figure 9). To do that, drag the Analysis Web item to your work area on the screen. In my example, I put it in the right cell of the second row in the table (Figure 10).
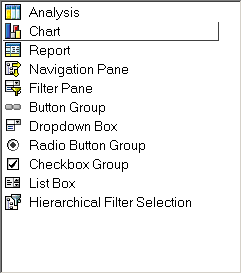
Figure 9
List of standard Web items
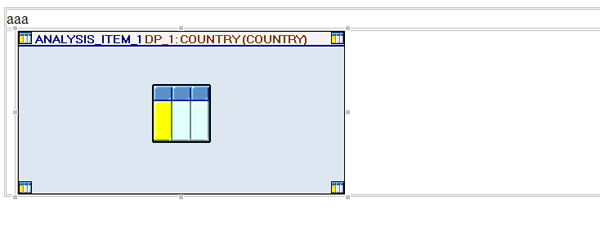
Figure 10
The Web template work area
Next, add an HTML tag called marquee, which is used to scroll data. It is only available with Microsoft Internet Explorer. You can read more about the marquee tag at https://www.w3schools.com/cssref/default.asp#marquee.
I want my marquee on the left cell of the second row. It will roll the data coming from my RSS feed. To add the marquee, click the cell where you are going to add the tag. Enter dummy text (e.g., ZZZ) that helps you locate the place into which you copy the code shown in Figure 11.

Figure 11
Add HTML code for the marquee tag
To find the right place where you copy the code, click the XHTML tab in the Web application designer screen (Figure 12).

Figure 12
Web template tabs
To find the dummy text that you entered earlier (ZZZ), perform a simple search using CTRL + F or follow menu path Edit > Find. Replace ZZZ by cutting and pasting the code in Figure 11. As you can see, in the code I add some background color (bgcolor="#e0e0c5") to easily identify the marquee area. I also add a SPAN HTML tag and give it the ID items, so I am able to reference it later from my JavaScript code and fill it with the data coming from the RSS feed.
Move back to the Layout tab in Figure 12 and add an Input tag into which the user enters the RSS URL. Add the HTML Input field to the first row, in which you currently have the aaa value. Now delete the aaa text and insert the Input tag from the menu item following menu path Insert > Any Tag, which takes you to the screen in Figure 13.

Figure 13
Add Any Tag HTML tag (note the initial screen comes with an A in the field)
Select INPUT from the drop-down menu (Figure 14).
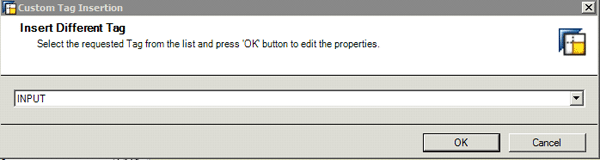
Figure 14
Add the INPUT HTML tag
On the next screen, click the Attributes tab, and enter rssPath as the value for the id attribute for the input tag (Figure 15).
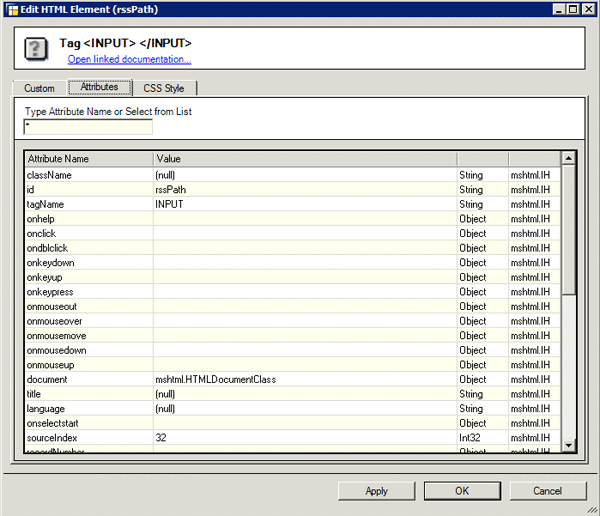
Figure 15
Add rssPath as a value in the Attributes screen
Next, click the CSS Style tab, in which you set parameters that affect the display of the element. For the width property, enter the value 1000px (Figure 16). Click the Apply button, and then the OK button.
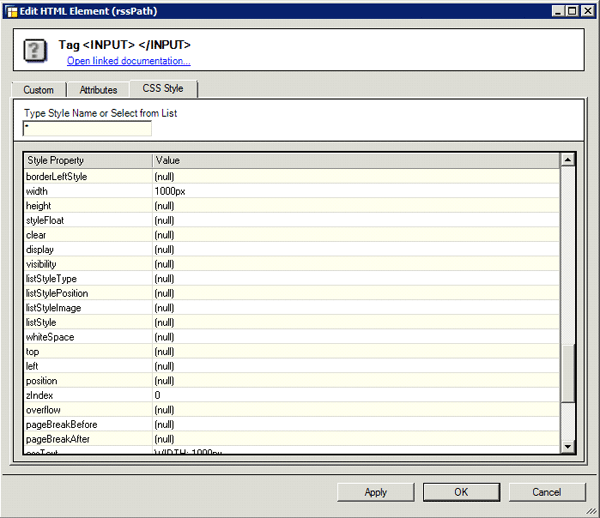
Figure 16
Add 1000px as a value in the CSS Style screen
In the next screen, I suggest that you add a simple text before the input tag just to let users know what they are expected to do with the Input field. Over the field box, type in the words Please enter the RSS URL. Your template should look like Figure 17.

Figure 17
The template shows a prompt for users to enter an RSS URL
Now you enter the JavaScript code that collects the data from the RSS feed and arranges it to be displayed in the marquee tag that you created earlier.
To enter the code, add a Script Web item from the Web items list (Figure 18) and drag it to the work area of the screen under the HTML table. The Script Web item is not visible to the users. It is purely technical, and so the actual location is not important. You can find the Script Web item under the Miscellaneous section.

Figure 18
Add the Script Web item
After adding the Script Web item, click it and you are able to see the properties on the lower left side of your screen (Figure 19).

Figure 19
Script Web items properties
To add the code, click the period icon  next to the Default cell in Figure 19. That takes you to a blank screen (Figure 20), into which you enter the JavaScript code.
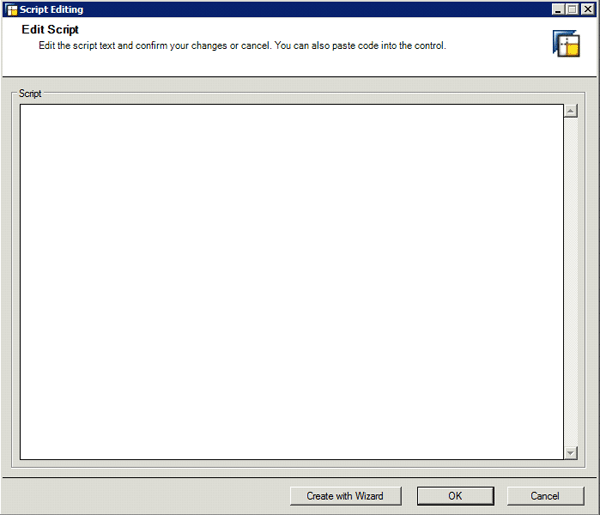
Figure 20
Edit Script screen
In my example, I copy the following script (Figure 21) to the screen shown in Figure 20. Click this link to open the code in Word for copying.
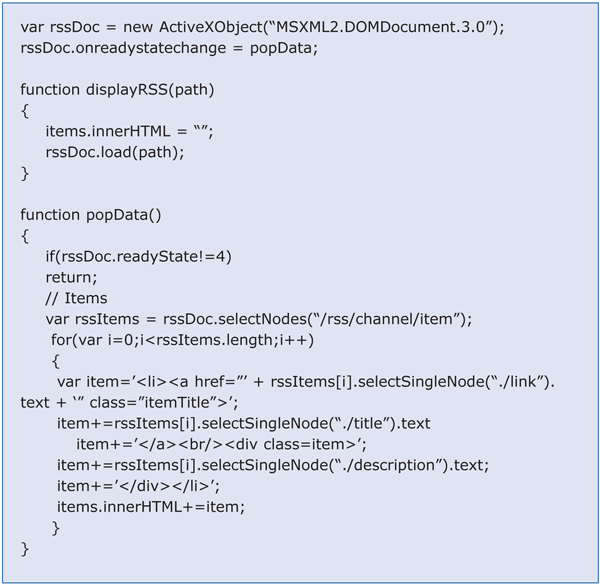
Figure 21
Enter this script into the Edit Script screen
In the final step, add a button that calls the displayRSS function with the RSS URL the user adds. To do that, add a Button Group from the standard Web item list (Figure 9) and locate it next to the input tag that you added earlier. You now need to give the button a name and an action. Start by going to the button group Properties screen (Figure 22).
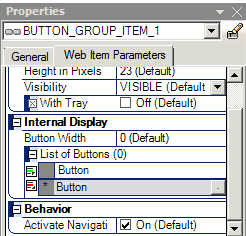
Figure 22
Button group properties screen
To add a new button, click the period icon next to the List of Buttons section to get to the screen shown in Figure 23.
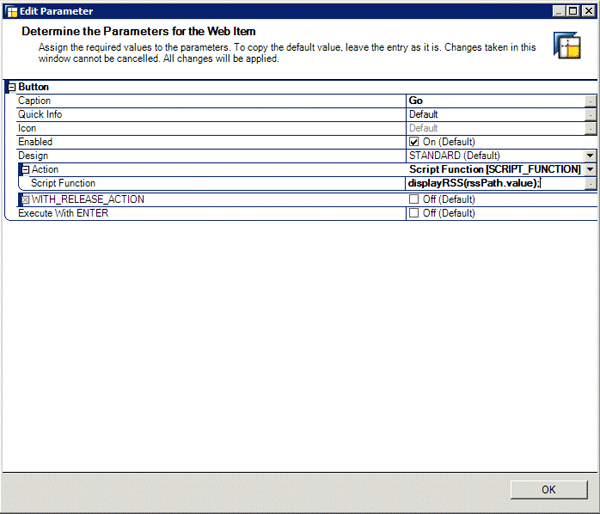
Figure 23
Define button properties and actions
In this screen, give the button the caption Go by entering Go into the field next to Caption. For the action, choose Script Function from the drop-down list. In the next line (Script Function), enter the following text: displayRSS(rssPath.value); — make sure to include the semicolon. Click the OK button. You can also select the function displayRSS from the dropdown list next to the script functions and just add in rssPath.value within the parentheses. The final template looks like Figure 24.
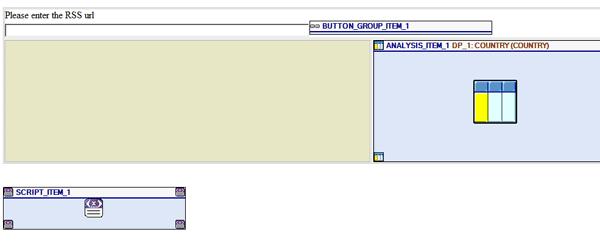
Figure 24
The final template
Execute the template by clicking the menu item Web Template and the execute icon, which takes you to the screen in Figure 25.

Figure 25
The final report
Into the input tag paste the RSS URL, which is https://tinyurl.com/c5nn4aj.
Click the Go button and get the quotes shown in Figure 26.
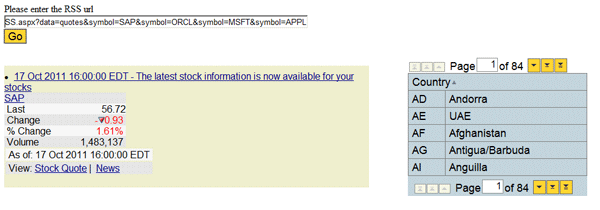
Figure 26
The final report with the RSS feed
Shlomi Weiss
Shlomi Weiss is CTO at BICS Israel LTD. He has 10 years of experience in classic BI and SAP NetWeaver BW. BICS Israel LTD is a niche BI consulting services company that provides a full spectrum of integrated enterprise information management consulting services and solutions, serving a wide variety of enterprises in many industries.
If you have comments about this article or BI Expert, or would like to submit an article idea, contact the BI Expert editor.
You may contact the author at Shlomi.Weiss@bics.co.il.
If you have comments about this article or publication, or would like to submit an article idea, please contact the editor.