Learn how to transfer organizational management objects, along with their attributes and relationships, from one SAP system to another using the standard SAP transport system.
Key Concept
An organizational plan is created with different organizational objects linked with each other by the relationships infotype. An organizational object consists of the required object infotype and other infotypes to specify the attributes of the object. At the completion of the final organizational plan in an SAP development instance, it may be required by the company to move the entire organizational structure to the test and production environment. There also may be a need to transfer the changes to organizational objects to different SAP systems. Sometimes other non-HR SAP modules residing in a different SAP system need the SAP organizational structure mainly for approval requirements using SAP Business workflow. If the decision is to create or maintain the SAP ERP HCM organizational plan in only one SAP system, you can leverage the HCM organizational data sharing between different SAP systems using the SAP transport mechanism.
There are three ways of transporting organizational management (OM) objects between SAP ERP systems:
- Automatic transport
- Manual transport without object lock
- Manual transport using object lock
You can set up these transport connections by following IMG path Personnel Management > Organizational Management > Transport > Set Up Transport Connection, or by using transaction code OOCR. The transport switch TRSP CORR is set in the table T77S0 as a result of the configuration shown in Figure 1. The following three values are possible:
- Blank: Automatic transport connection
- X: Manual transport without object lock (no automatic transport)
- T: Manual transport using object lock (no automatic transport)

Figure 1
Transport settings
Let’s look in more detail at these three values.
Automatic Transport
The automatic transport connection should be activated first as mentioned in the above step using the value blank for the switch TRSP CORR.
If you select automatic transport, the system asks you for a transport request each time OM objects are maintained. You have to create one or use an existing change request to save your changes. Later on you need to release your task and change request to import the objects under the change request to the target system. If you are creating a new organizational plan from scratch, this type of transport connection is not recommended as it requires too many prompts to the user to select a transport request.
Manual Transport Without Object Lock
When setting transport switch TRSP CORR with value X in customizing, the system does not ask for a transport request while creating, changing, or deleting any personnel planning objects. The program RHMOVE30 is used to manually select the objects to be transported. It can be used to delete the objects from the source and target system as well. This program can be accessed via IMG menu path Personnel Management > Organizational Management > Transport > Manual Transport, or via transaction code RE_RHMOVE30.
Tip!
When using the manual transport program RHMOVE30, release the transport request immediately to avoid any unexpected changes done to the same object. This is important as OM transport is always by object. One drawback of selective manual transport using the program RHMOVE30 is that if the person responsible forgets to include an object in the transport request, that object, along with all the associated infotypes, will not be transported. This can cause data inconsistency in the target system.
You can select the number of objects to be transported in the report selection screen by different selection conditions. The selection screen program RHMOVE30 also allows options to further select any particular object using the evaluation path as shown in Figure 2. Select all the objects to be transported as shown in Figure 3 and assign these objects to a change request. When you release the change request all the objects under the change request are imported into the target system.

Figure 2
Program RHMOVE30 selection screen

Figure 3
Selected objects for transport
For planning objects, a relationship is only created if the related object already exists in the target system. However, the relationship between the OM objects and the external objects (e.g., cost center and person) are generally created in the target system, even if the external objects are not present in the target system.
All the personnel planning and development infotypes included in the transport request using program RHMOVE30 can be seen using the transaction SOBJ and doing the following navigation: click the Display button on the initial screen, then click the Position. . . button on the following screen and enter PDST. Press Enter, select Object PDST, and click -->Piece list (Figure 4).
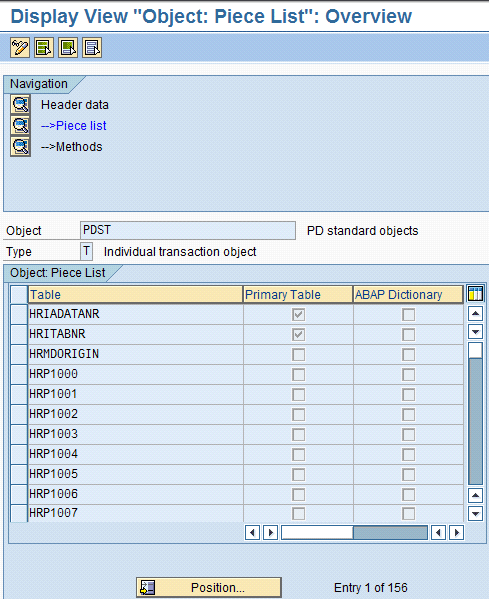
Figure 4
Display object list
You can adjust the PD transport object PDST (Figure 4) by running program RHSOBJCH. This may be needed to include any new standard infotypes or custom infotypes to the transport object.
Note
If SAP comes up with any new infotypes after an upgrade or you create new custom infotypes in your system, run program RHSOBJCH to include these new infotypes to the transport object PDST. Similarly, if the transport object PDST contains an infotype which does not exist in your system, use this report to remove that infotype table from PDST.
Manual Transport Using Object Lock
When manually transporting an object using an object lock, first set the transport switch TRSP CORR with the value T in customizing. Again, the system does not ask for a transport request while editing the planning objects. Instead, the system sets the repair flag for the changed or deleted objects in table PLOGI or PLOGI_DEL. The user runs the standard report RHMOVE50 to include all the objects for which the repair flag is set in a transport request (Figure 5). As soon as the changed or deleted objects are included, the repair flag is automatically reset for these objects in the table, either table PLOGI or PLOGI_DEL. Then release the change request and the system imports all these objects to the target system.

Figure 5
Program RHMOVE50 selection screen
General Transport Rules
It does not matter what transport connection is used — the system always transports OM data by object. If the object does not exist in the target system it is created along with all the infotypes being transported from the source system. If the object is present in the target system before transport, it is overwritten by all the associated infotypes transported from the source system.
It is tricky to transport an object without any relationships created in the source system when relationship infotype 1001 exists in the target system for the same object. In this particular case, all the relationships tied to the same object in the target system are deleted. You can take advantage of object lock (import lock) as mentioned later in the article to prevent certain infotypes from being overwritten in the target system as a result of the transport.
Note
You can’t transport object types that are external to OM such as cost center (K) or person (P), using any of the above programs. The table T77EO holds these external object types.
Note
Make sure that an active plan version is set up in the target system to avoid activation-related issues after transport. You can set this up using standard transaction code OOAP. Note that if the object number to be transported already exists in the target system it will be overwritten as a result of transport.
You can always create and maintain the complete organizational plan directly in the production system. Many users prefer that method instead of moving OM data between different systems and taking on the challenge of keeping all the systems in sync. If you need to build an organizational structure first in development, move it to the test environment and to production after getting the necessary approval, then transport is the preferred way to do this. If SAP ERP HCM resides in a different SAP system, the OM data transfer from one SAP system to another using transport is the easiest way to accomplish this.
Keeping Number Ranges in Sync
You can use the program RHCHECKP to check number range consistency in the target system after transport. If the program finds any number range inconsistencies after transport, you need to manually correct the number range. You can update the number range by using IMG path Personnel Management > Organizational Management > Basic Settings > Maintain Number Ranges.
Import Lock
You can set up an import lock (also called an object lock) via IMG path Personnel Management > Organizational Management > Transport > Lock Infotypes for Import, or by maintaining an entry directly in the table T77TR. You enter the infotypes and subtypes along with the object type as illustrated in Figure 6 to protect them from being overwritten as a result of transport. Figure 6 means that infotype 1001 (subtype B003) is locked for import for object type O. When you make an entry in the table, the infotype is locked for import.

Figure 6
Table entry T77TR
Note
Planning objects are transported via the Never use plan version. Plan versions are stored in table T778P. The Never use plan version is not intended to be used as an active plan version in a system. As the active plan version of the target system may be different from the source system, the transport uses the Never use plan version. When objects are written into the transport, copies of the table entries are written with this Never use version. At the time of import into the target system, the records are copied from this plan version to the active plan version of the target system with the activation method. You can run program RHWFACTI to resolve an error during activation.
Transport Beyond Target System
You can use the report RHMOVE60 to transport planning objects further to different systems. You can move objects from one transport request to another using this report (Figure 7).

Figure 7
RHMOVE60 selection screen
Note
After the transport is done, there are standard reports to check the data consistency. You can go through the documentation and run these reports. Examples of some standard reports are RHCHECKP, RHCHECK1, RHCHECKV, RHCTIMCO, and RHCHECKRELATIONS.
Other Utilities Used to Transfer OM Data
There are also standard import/export tools to transfer OM data without using the SAP system transport mechanism. Available programs are RHMOVE00, RHMOVE40, and RHALTD00 to handle this type of transfer. I go into more detail about when not to use OM transport in the following section.
Circumstances In Which You Would Not Use OM Transport
If the object numbers to be transported already exist in the target system and you do not want them to be overwritten, use another method — other than OM transport — to create those objects in the target system. One method would be to download the data in a file from the source system and upload it into the target system using any utility. Also, if the data transfer is required from an SAP system into another, non-SAP system, you can’t use the transport method. If the requirement is to download the OM objects from the source system and make changes to it before loading into the target system, then the OM transport is not an option.
Post-Transport Data Maintenance
You may need to check the integration points between the personnel administration and the OM data after the transport is done. Depending on the situation, it might be necessary to run integration reports, such as RHINTE10 or RHINTE30, to make sure the personnel administration and OM data are in sync.
Debanjan Chattopadhyay
Debanjan Chattopadhyay specializes in SAP HCM (Personnel Administration, Organizational Management, Compensation, Payroll, ESS, and MSS). He has worked on multiple SAP HR/Payroll projects comprising full-cycle implementations, upgrades, post-implementation support, and outsourcing engagements since 1997. He currently works as a senior SAP HR manager and solution architect for Citrix Systems.
If you have comments about this article or publication, or would like to submit an article idea, please contact the editor.