Quick Tip: How to Configure and Explore Date-Based Data Within Explorer 4.1 Information Spaces
I demonstrate, using step-by-step instructions, how to configure date-based data within an SAP BusinessObjects Explorer 4.1 information space so that the date-based data, including days of the week and months of the year, can be displayed and analyzed within an information space in chronological order rather than alphabetical order. An alphabetical sort of days or months does not show the user the values in the order that they have actually occurred and makes it difficult to conduct analysis over consecutive periods of time. On the other hand, chronologically sorting days or months does show the user the values in the order that they have actually occurred and allows for analysis over consecutive periods of time.
This article is intended for SAP BusinessObjects developers and administrators who are responsible for developing and managing SAP BusinessObjects Explorer 4.1 applications and for the configuration of Explorer 4.1 information spaces.
There are four steps to this process:
Explore related questions
- Connect to SAP BusinessObjects Explorer 4.1
- Explore an Existing Information Space
- Modify an Existing Information Space
- Explore the Modified Information Space
Step 1. Connect to SAP BusinessObjects Explorer 4.1
In order to configure and use the configured date-/time-based data functionality within Explorer 4.1, a user must have the following prerequisites in place:
- Access to the SAP BusinessObjects BI launch pad application
- Access to the SAP BusinessObjects 4.1 Explorer application
- View rights to information spaces
An administrator of SAP BusinessObjects should be able to set these rights for any users of the system as needed.
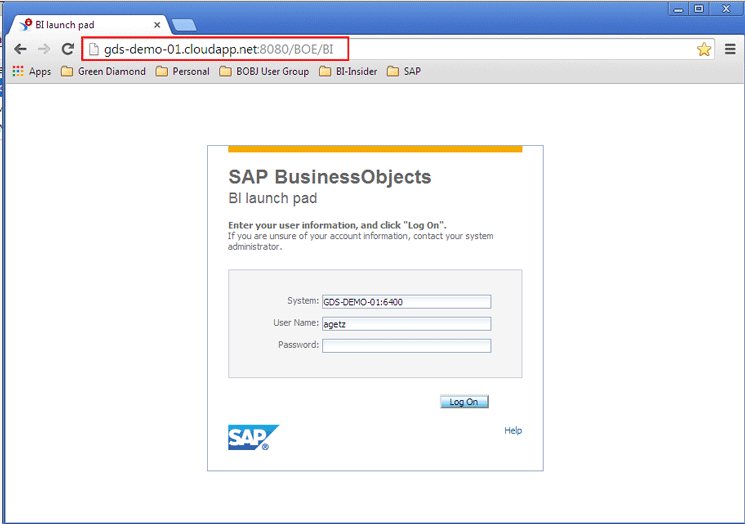
Once you have the required prerequisites in place, connect to the BI launch pad application using the URL for the BI launch pad application as shown in Figure 1.
In the screen that opens (not shown), click Applications > Explorer at the top of the screen or click the Explorer icon on the bottom right to connect to SAP BusinessObjects Explorer 4.1
Step 2. Explore an Existing Information Space
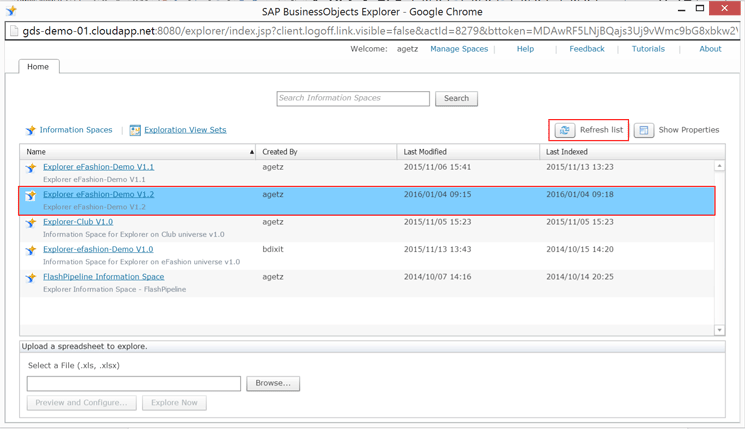
This opens the Home page of SAP BusinessObjects Explorer (Figure 2). Click the information space Explorer eFashion-Demo V1.2 link to open and explore this information space (Figure 3).
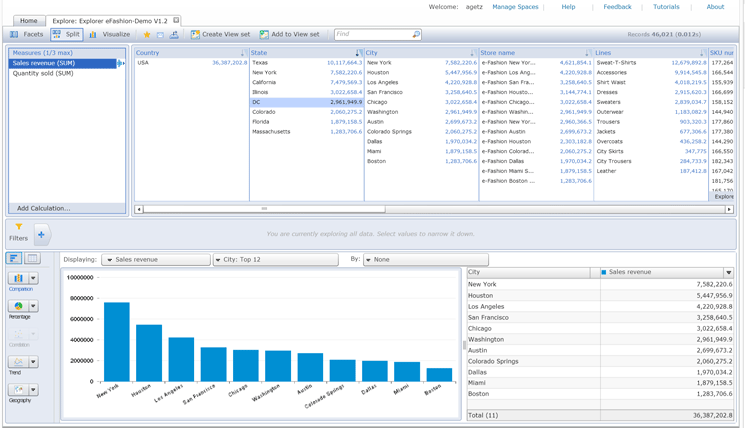
Scroll right until you see the Month Name column. Click the Change Current Sort icon (Figure 4), and select the Left Column Ascending option from the drop-down menu that opens.

The months are re-sorted in ascending alphabetical order with April first and September last, as shown in Figure 5.
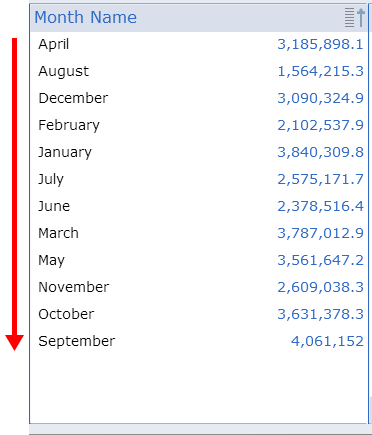
(Note: By default, Explorer allows facets—such as months—to be sorted in ascending or descending alphabetic order, from A to Z. However, for certain types of date-based data, such as days of the week (Monday, Tuesday, Wednesday, and so on) or months of the year (January, February, March, and so on), an alphabetic sort generates a sort order that is not useful for analysis over time. Rather date-based fields should be ordered in chronological order with the earliest date first and the last date last. Chronological order of date-based fields provides better and more intuitive analysis for the user of SAP BusinessObjects Explorer because it shows the user the values in the order that they have actually occurred and allows for analysis over consecutive periods of time.)
Step 3. Modify an Existing Information Space
Now click the Manage Spaces link at the top of the screen (as shown in Figure 3) to modify an existing information space.
This opens the Manage Spaces page of SAP BusinessObjects Explorer (Figure 6). Here you can configure and index existing information spaces, and create new information spaces.
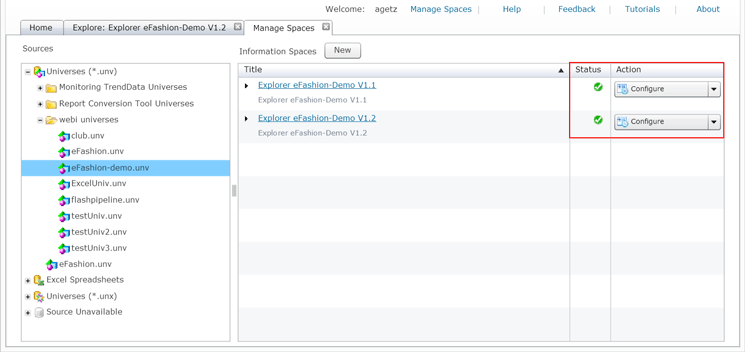
Navigate to the Explorer eFashion-Demo V1.2 information space. To edit/configure the selected information space, either single-click the Title of the information space or choose Configure from the Action drop-down field.
The next screen opens in the Properties tab (not shown). Click the Objects tab to see the objects of the Explorer eFashion-Demo v1.2 information space (Figure 7).
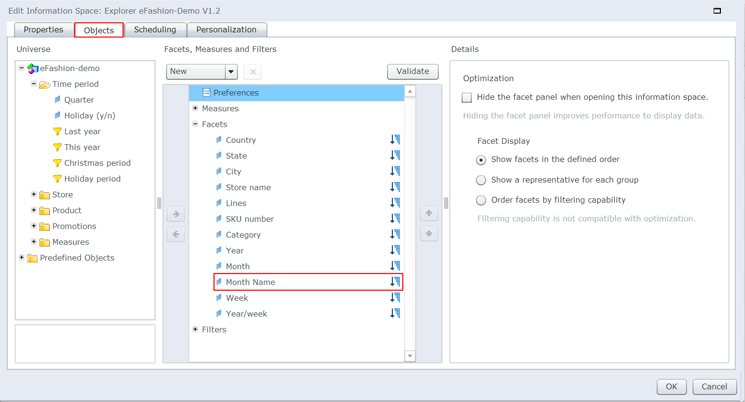
In the middle section, under Preferences, you configure the facet to be a date-based field that can be sorted in chronological order. In this case, you want to configure the Month Name facet so that January is first and December is last. Select Month Name from the list of facets in the middle of the screen as (Figure 7). Then change the dimension type from Standard to Months (Jan..Dec) in the details panel on the right (Figure 8).
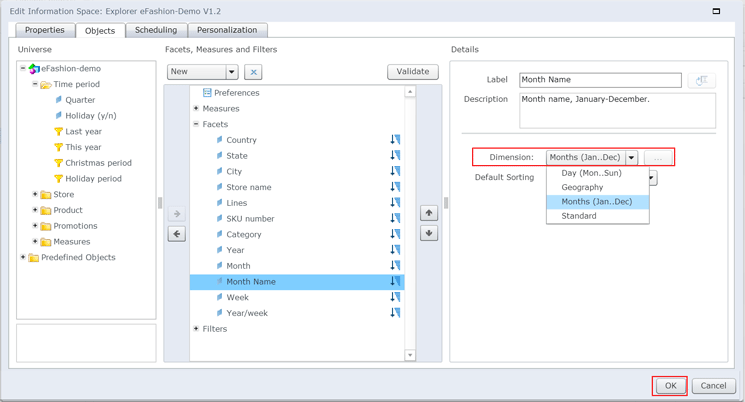
Click the OK button to continue.
Step 4. Explore the Modified Information Space
This takes you back to the Manage Spaces page of SAP BusinessObjects Explorer. From the Action drop-down options (on the right of Figure 9), select Index Now (next the Explorer eFashion-Demo v1.2 information space). This compiles and refreshes the contents of the selected information space (this process may take a few minutes to complete).
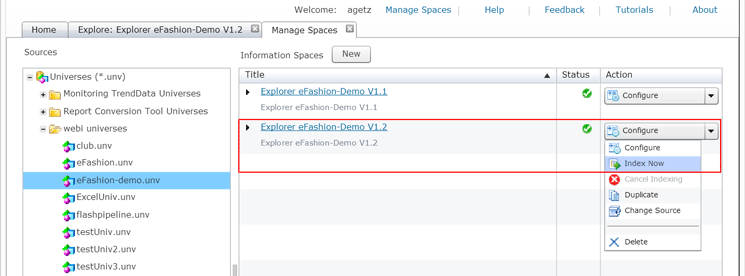
(Note: The Index Now option updates the data and metadata included within information spaces. Before the information space can be made available to end users and appear on the SAP BusinessObjects Explorer Management Page – Information Spaces subpage, it must be indexed. Information spaces should be also be indexed after any editing so that any modifications are included. If an information space is not re-indexed after reconfiguration, it is not be updated on the Home Tab and changes to the information space are not visible to users.)
Once it is successfully indexed, go back to the Home tab and click the Refresh list button (Figure 2). This updates the list of information spaces and makes the data within the newly indexed information space available to the user.
Click the Explorer eFashion-Demo V1.2 link to open the information space to explore it. Again scroll right to the Month Name column on the right, click the Change Current Sort icon, and sSelect the Left Column Ascending option from the drop-down menu that opens.
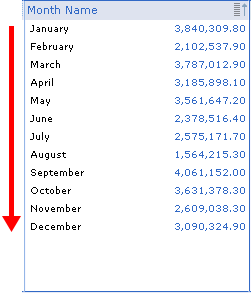
In the screen that opens (Figure 10) the months are now sorted in ascending chronological order, with January first and December last. Previously, the months were sorted in alphabetical order with April first and September last.
