I show a simple way to add hyperlinks to Excel reports that link to employees’ payslips. First, an HTML file of all relevant employees' payslips is downloaded from the SAP system into a local folder. Then an SAP payroll report is downloaded as an Excel file to the same folder. Next a macro is used to create hyperlinks in each row of the Excel files. When a hyperlink is clicked, another macro creates a web-based pop-up screen to display the payslip for the relevant employee. The macros in the Excel spreadsheet are written using Visual Basic for Applications (VBA) and, since all the calculations take place outside of the SAP system, no ABAP coding is required. These macros are short and I give the details of how to set them up.
Figure 1 shows an example of the kind of Excel Workbook I am talking about. In this scenario, payroll has been run and a wage type reporter has been used to create a spreadsheet of payroll results for selected employees. Hyperlinks have been added to the personnel numbers in the first column. A hover textbox shows the description view payslip.
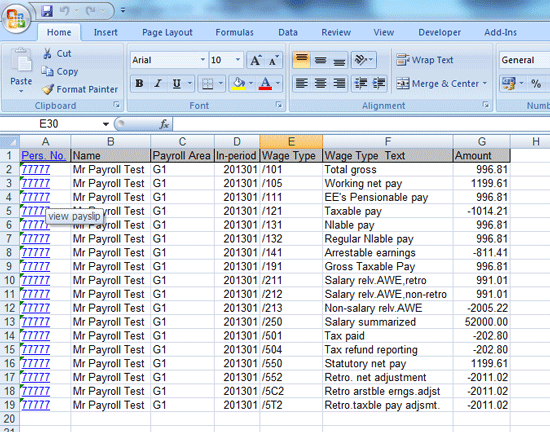
Figure 1
Example of an Excel payroll report from SAP ERP HCM showing hyperlinks
When one of the blue hyperlinks in the first column (Pers. No.) is clicked, a pop-up window appears, showing the payslip for that employee (Figure 2). This makes it very easy to cross-reference the figures in the spreadsheet to the payslip.
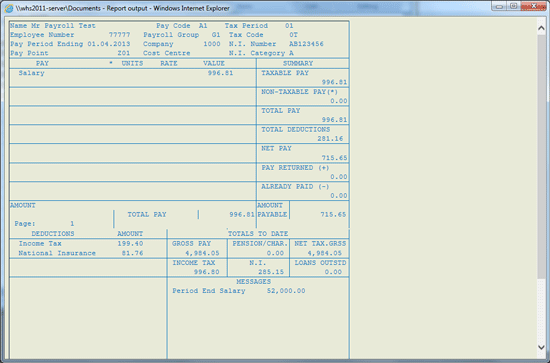
Figure 2
Example payslip created by clicking a hyperlink in an Excel report
The following steps show you how to set up an Excel report with payslip hyperlinks.
Download a Payslip File
The first step is to download the payslip file in an HTML format. Using the remuneration statements program (transaction code PC00_M08_CEDT or the corresponding version for your country), enter the selection criteria for the employees, such as Payroll period, Payroll area, and Form name (Figure 3). You can enter a range of personnel numbers or leave the personnel number field blank to show payslips for all the employees in the payroll area. Click the execute icon to display the payslip file (Figure 4).

Figure 3
Selection screen for the remuneration statements

Figure 4
Sample payslip produced by the remuneration statement
Follow menu path List > Save/Send > File, and the pop-up window shown in Figure 5 opens.

Figure 5
Save the payslips in HTML format
Select the HTML Format radio button to save the text in HTML format and click the green checkmark icon. Another pop-up is shown (Figure 6). Enter the Directory where you want to save your new file (U:payroll data in my example). Enter payslips.htm as the File Name. To keep the VBA code as simple as possible, this file name has been hard-coded in the macro. See the section at the end for more details about how to do this. Click the Generate button to save the file into the specified directory.
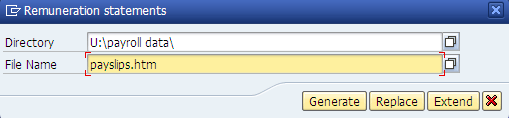
Figure 6
HTML payslips file directory and file name
Download an Excel Report from SAP ERP HCM
The next step is to create an Excel report that you want to link to the payslips. (I am assuming that readers of this article have enough knowledge of the SAP ERP HCM system to run reports and download them to Excel.) Any standard payroll or HR report or SAP Query that has the functionality to download to Excel can be used. There are two considerations to keep in mind when downloading the report:
- The personnel number should be in the first column of the report
- The report must be run with selection dates matching the payroll period of the payslips
For my example I used the wage type reporter (transaction code PC00_M99_CWTR) to produce a wage type listing, and then chose the Excel display option as shown in Figure 7.
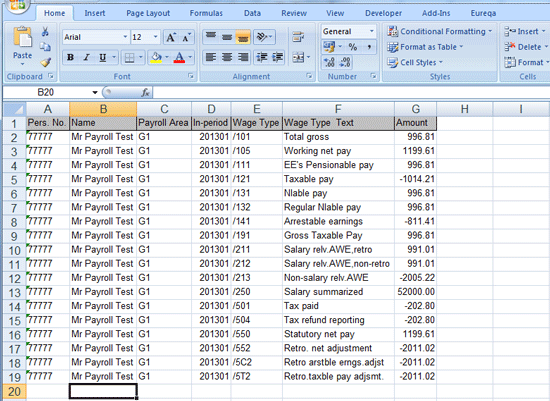
Figure 7
A sample wage type report generated from the SAP system and viewed in Excel
The Excel report needs to be saved in the macro-enabled format (.xlsm) so that macros can be added. So, when you’re in Excel and saving your workbook, make sure you choose the Excel Macro-Enabled workbook option (Figure 8).

Figure 8
Create a new Excel macro-enabled workbook
Note
There are a variety of different versions of Excel. This article describes how to run this comparison using Microsoft Office 2007 and later versions.
The Excel file can be saved with any name. In this example, I named my workbook wage types.xlsm (Figure 9). Save the file into the same directory as you saved the payslips file in Figure 6. In Windows Explorer, view the directory to confirm that both the HTML payslips file and the macro-enabled Excel report are present (Figure 9).

Figure 9
Windows Explorer showing the two types of files
Note
VBA-enabled workbooks are a serious potential security hazard and have been used to spread viruses. Never open any macro-enabled Excel Workbook from an unknown or untrustworthy source.
How to Add Macros to an Excel Worksheet
In this section, I show how to add the VBA code for the macros to the Excel spreadsheet. To do this, you need to turn on the VBA developer environment in Excel. Open the Excel macro-enabled file saved in the previous step (e.g., wage types.xlsm) and press Alt + F11. This opens the Microsoft VBA development environment (Figure 10).
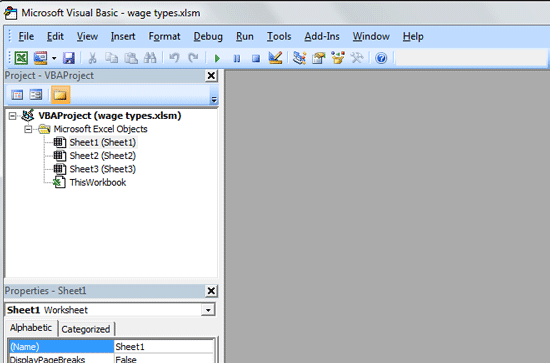
Figure 10
Open the Excel file
The screen is usually divided into three or more sections. In the top left section, click VBAProject (wage types.xlsm) to highlight it, and then select Insert > Module from the toolbar (Figure 11).
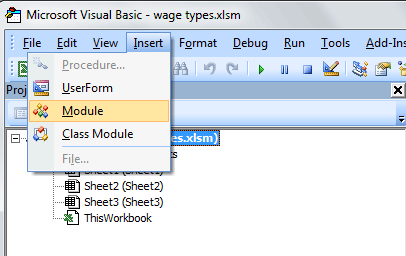
Figure 11
Inserting a code module into the Workbook
This creates a large blank area to the right of the project window that says insert code here (Figure 12). This is the space in which you can write the VBA code.
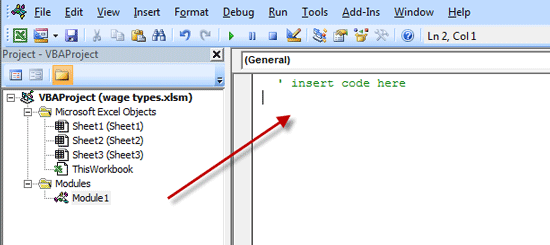
Figure 12
Insert the VBA code into an Excel Workbook
Copy and paste the code in Figure 13 into the code window. Once pasted in, the code should look like Figure 14, and be automatically split up into different subroutines by the development environment. (Click here for a downloadable version of this code: Download code in Figure 13.)
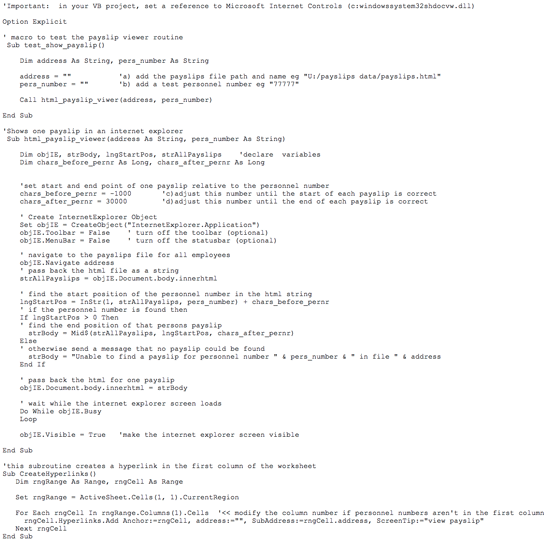
Figure 13
Paste this code into the window for the Workbook

Figure 14
Code added to Excel Workbook
Some code also needs to be added to the worksheet in the Workbook that will have the hyperlinks. Expand the Microsoft Excel Objects folder below VBAProject (Figure 15) and select Sheet1 (Sheet1).
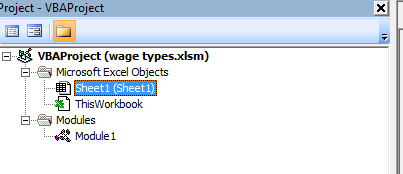
Figure 15
Click the Sheet1 (Sheet1) line
This opens the screen on the right of Figure 16. Select Worksheet in the drop-down list on the left (first red arrow). Select FollowHyperlink from the drop-down list on the right (second red arrow).

Figure 16
Select the Worksheet FollowHyperlink event for Worksheet 1
Two lines of code will be created automatically in the code area below the drop-downs:
Private Sub Worksheet_FollowHyperlink(ByVal Target As Hyperlink)
End Sub
Copy and paste the code in Figure 17 to overwrite these two lines. (Click here for a downloadable version of this code: Download of code in Figure 17.) When done it should look exactly like the code in the window on the right in Figure 18. Click the save icon to save your changes.

Figure 18
Paste this code into the window for each worksheet that has hyperlinks to payslips

Figure 17
Add code to the Worksheet FollowHyperlink Event for Worksheet 1
This design works by using Microsoft Internet Explorer to display the payslip. In order for the Excel VBA to communicate with Internet Explorer, some additional program libraries (called references) are required. These can be switched on within the VBA development environment (Figure 12). Select Tools and then References from the toolbar at the top. This opens the References pop-up window (Figure 19).
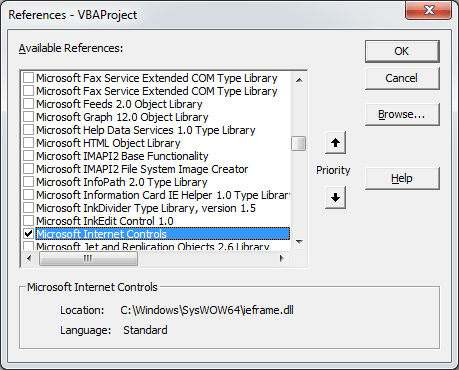
Figure 19
The Excel VBA references pop-up window
Scroll down the list of Available References and make sure that the check box next to Microsoft Internet Controls is selected. Click the OK button. The pop-up window closes and Figure 12 appears again. Click the save icon. Then click the green Excel icon at the top left of the toolbar (highlighted in Figure 20) to exit the VBA development environment and return to normal Excel.
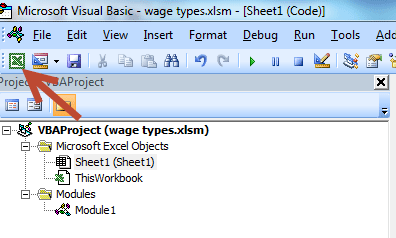
Figure 20
Return to Excel from VBA
Creating the Hyperlinks
Now you should be back in the normal Excel screen (Figure 21). To create the hyperlinks, click the View tab and then the Macros icon. This opens the Macro pop-up screen shown in Figure 22.
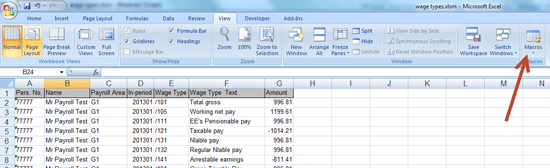
Figure 21
Excel worksheet before hyperlinks are added

Figure 22
Select the CreateHyperlinks macro from the list
Select the CreateHyperlinks line and click the Run button. The CreateHyperlinks macro runs and creates hyperlinks in each cell in the first column of the Excel worksheet (Figure 23).

Figure 23
Add hyperlinks to the personnel numbers column using the CreateHyperlinks macro
Clicking any of these hyperlinks calls up a new screen showing the corresponding payslip for that employee, so that the payslip and the matching payroll report can now be viewed side-by-side.
How It Works
In this section, I give more detail about how each macro works, and how each one can be modified to meet your own requirements.
CreateHyperlinks() Subroutine
This subroutine creates hyperlinks in each cell in the first column of the Excel spreadsheet. When a hyperlink is clicked, it triggers an event in Excel called Worksheet_FollowHyperlink.
Worksheet_FollowHyperlink Subroutine
This subroutine (the code in Figure 17) is called whenever a hyperlink is clicked in Worksheet 1. It determines the personnel number by reading the value in the cell in the first column, and also determines the file path for the payslips file—in other words, it looks for a file named payslips.htm in the same directory as the Excel file. (Remember, if you saved your payslips file with a different name than the one in Figure 6, then you need to update the code in Figure 17 accordingly.) The two parameters (file path and personnel number) are then passed to the payslip viewer subroutine.
HTML_Payslip_Viewer() Subroutine
This subroutine displays an HTML payslip, and Excel creates a new instance of Internet Explorer and switches off the toolbar and menu bar. At this point Internet Explorer is invisible. The HTML payslips file (with payslips for all the employees) is then passed to this invisible Internet Explorer. This large HTML file is converted into a very long character string which is then searched to find a specific personnel number. When this is found, the HTML file is converted into a smaller file that contains the payslip for only one employee.
How to Fine-Tune the HTML_Payslip_Viewer Subroutine
A very basic method is used to convert the HTML file with all the payslips into a smaller file with only one payslip. The routine assumes that each payslip starts 1000 characters before the personnel number and ends 30,000 characters after the personnel number. These numbers are large because the HTML file contains so many filler characters. This can be understood more easily by looking at the code in Figure 24, which shows the HTML source code for the payslips file. The personnel number is highlighted in pink and the red arrows show the start and end points of one single payslip.
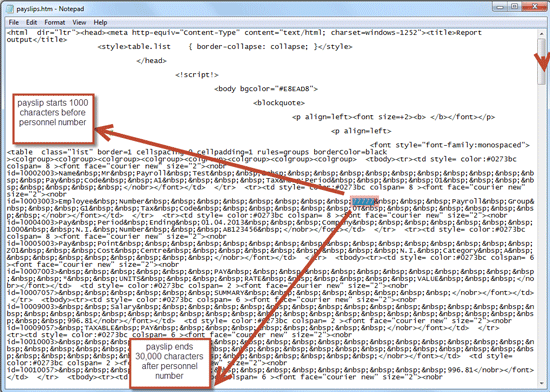
Figure 24
Viewing the HTML code for one payslip
The default values are found by trial and error, and need to be adjusted for your own payslips. There are two parameters that define the start and end points of each payslip. The start point parameter defines the number of characters in the HTML file that precede the personnel number on each payslip. The default value is chars_before_pernr = 1000.
The end point parameter defines a number of characters in the HTML file that follow the personnel number on each payslip before the following employee’s payslip begins. The default value is chars_after_pernr = 30000.
Adjust both of these numbers until the start and end points of each payslip are shown correctly (i.e., the payslip is not truncated and does not show more than one payslip) as in Figure 25.You can use the test_show_payslip routine described below to speed this up.

Figure 25
Adjust the payslip start and end parameters
The test_show_payslip() Subroutine
This is an optional utility subroutine that calls the payslip viewer directly without setting up any hyperlinks. This was created to make it easier to test, debug, and experiment with the payslip viewer. To use it, you need to adjust the code in Figure 13. Here’s how: In the VBA development environment, find the test_show_payslip() Subroutine and find the code shown by the arrow in Figure 26.

Figure 26
Update the parameters for the test_show_payslip() subroutine
Then make the following changes by updating the file address and personnel number parameters on the two lines indicated by the arrow in Figure 26:
- Address line: Add in a full file path and name for the payslips file in between the inverted commas. For example: address = “C:/payslips data/payslips.HTML”
- Pers_number line: Add a personnel number for one employee between the inverted commas. For example: pers_number = “77777”
Click the save icon to save your changes. Then click the green Excel icon at the top left of the toolbar to exit the VBA development environment and return to normal Excel (Figure 20). Here you run the macro by clicking the View tab and then the macros icon (Figure 21). Select the test_show_payslip line in the pop-up window that opens (Figure 22) and click the Run button. The payslip is displayed like the one shown in Figure 2.