Seven Essential Tips and Tricks for Queries and Tables – Part Two
Have a look to the second part of these tips and tricks, which will make your day easier and faster in SAP. Learn how get the FI document number when you post through then MIRO transaction, explore how to take advantage of the Multiple Selection functionality, see how easy you can define default values for input fields and explore how to turn customizing transaction into functional transactions in few steps.
If you missed Part 1 of this Tips & Tricks Series you can find that here: https://masteringsap.com/sevenessentialtipsandtricks/
MIRO transaction: get the FI document number displayed when you post in MIRO
Explore related questions
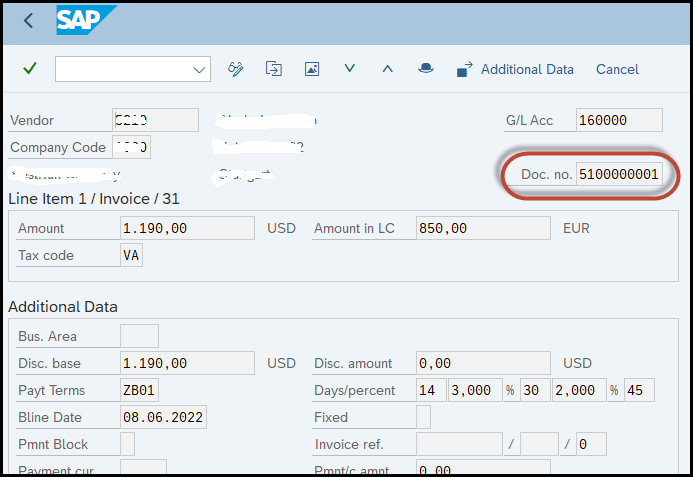
Normally, when you save an invoice in the MIRO transaction, the document number that you get displayed as a result is the logistic document number (the one that almost starts with 510…) and not the FI document number.
That is why when we want to search that invoice in FBL1N or with SE16 in any table, we never find this number for BKPF-BELNR.
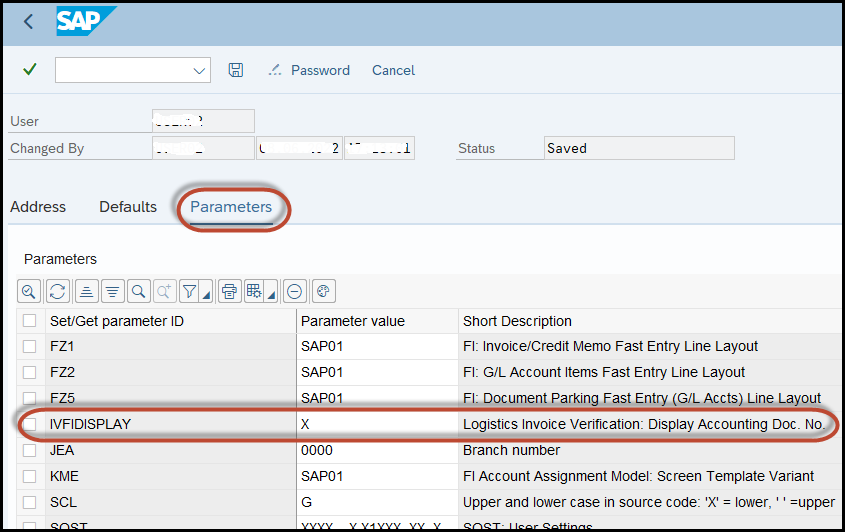
It can be modified when you edit the “User Parameters” from SU3 transaction, by adding “IVFIDISPLAY” (Invoice Verification FI Display) and the value “X” for your user.
Once you save the new parameter, exit from SAP and login again. Try to post again an invoice in the MIRO transaction. Now you will see the FI document number displayed, with the logistics document number.
Try it as follows:
1) When you post an invoice in MIRO before the change you see it like this:

2) Add the user parameter in SU3 transaction (IVFIDISPLAY – X):
3) Logout, login again and create a new MIRO invoice. You will see the result as follows, including the FI document number in brackets at the end:

If you enter for example to the FBL1N transaction you can identify there the same document by the FI document number (BKPF-BELNR):

The same happens if you access the FB03 transaction for this document. You can find the same document number there:
By using this, we have both document numbers at the same time, which it for sure very useful for the end user.
I hope this helps!
How you can use the “Multiple Selection” functionality in a friendly way
For sure, more than once you had the need to work with the “Multiple Selection” functionality for a specific selection field. It is very common when we have few values to complete to copy 8 values from an external source, to paste them, to press “Page Down”, to copy the next 8 values, to paste again and so on up to the completion of the desired values.
In fact, there are two easier ways to perform this, in case you have many values to enter for a specific field.
First Option:
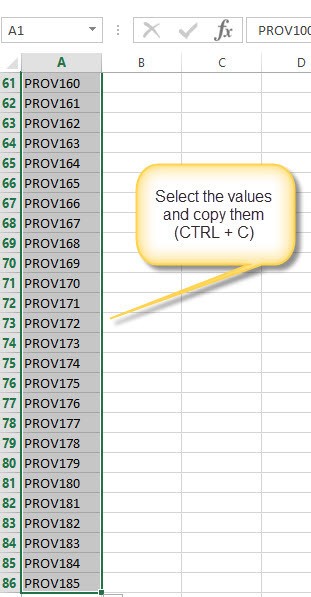
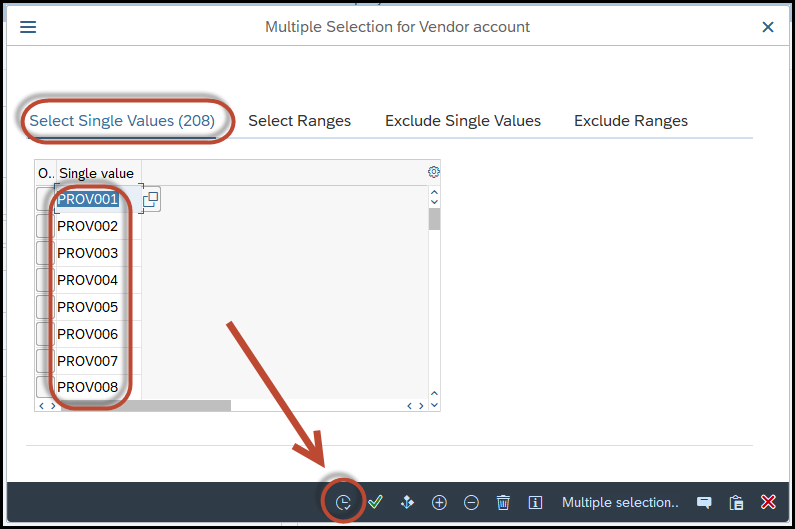
1) Suppose you need to complete the “Vendor Account” field in any transaction with more than 100 values. In this case you will use the “Multiple Selection” functionality:
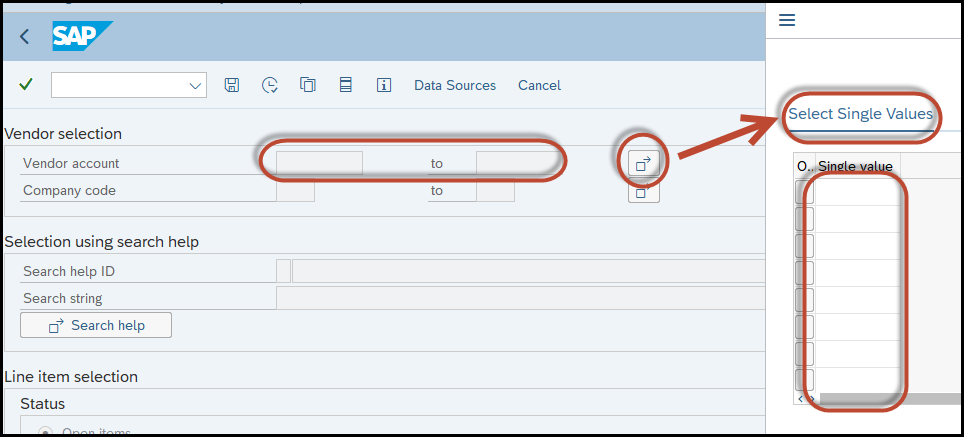
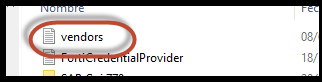
2) Go to your external source and copy all the values you need to enter:
3) Return to the SAP screen and hit on the “Upload from Clipboard” icon:
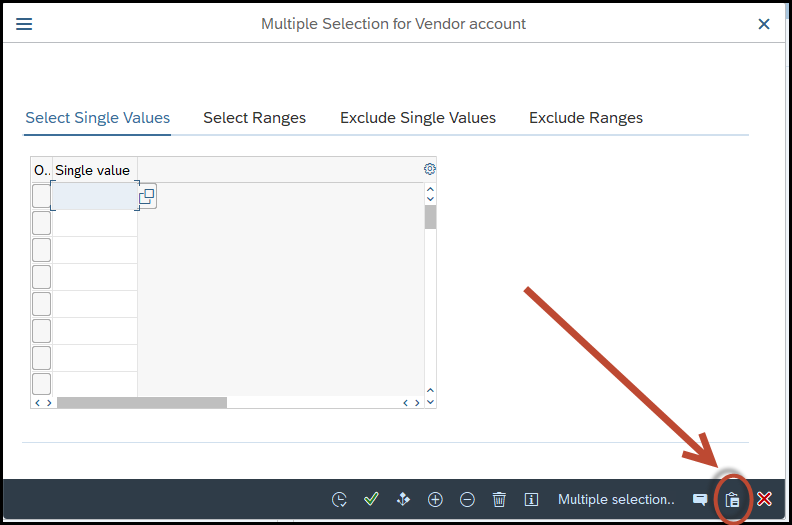
4) You will see how all your values are now available to be selected for the specific field:

Now you are able to execute the transaction just for these values in an easy way.
Second Option:
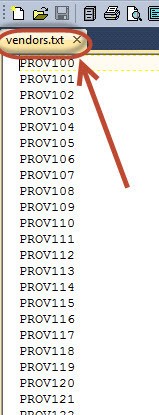
1) Suppose you are in the same transaction, but you have in a TXT file all the values to be completed for that field.
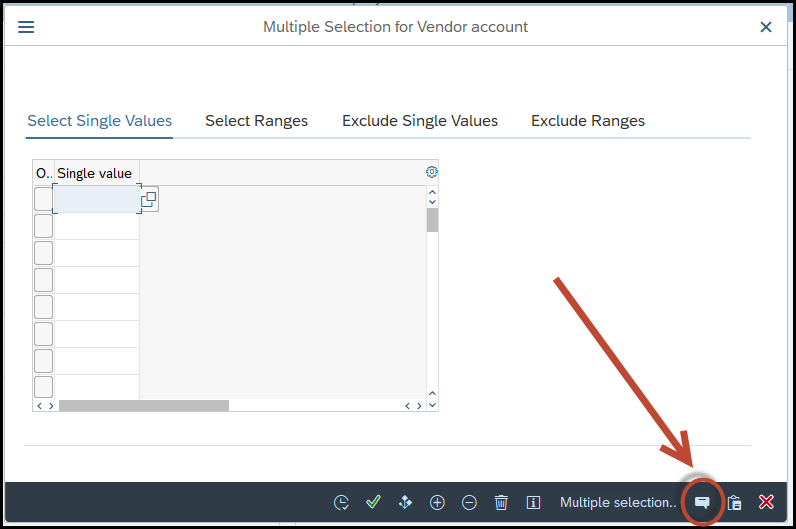
2) Go to the specific selection field (“Vendor Account” in our case) and hit on the “Multiple Selection” functionality:

3) Press the “Import from Text File” icon:
4) Select the file that you have with all your values to be completed (step 1 for this option):
5) You will see how all your values are now available to be selected for the specific field:
With this option, you also have all your values available with just a few steps.
How you can define input fields with a Default Value
Very often, when you work with the same Company Code, the same Cost Center or the same Purchase Organization (the list can be very large) you always enter the same value when you have to complete these fields. This makes you waste time, since having some fields always with a default value would save you some minutes.
Well, in fact, this is very easy to solve. I will show you this with one specific field. You can apply this to many input fields, but not to all of them.
In case you always work with the same Company Code, do the following:
1) Find a transaction where you have this input field available. For example: F-02
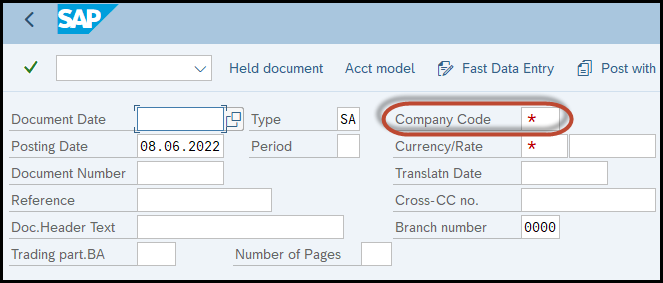
2) Press F1 (Help) on the field and then choose “Technical Info”

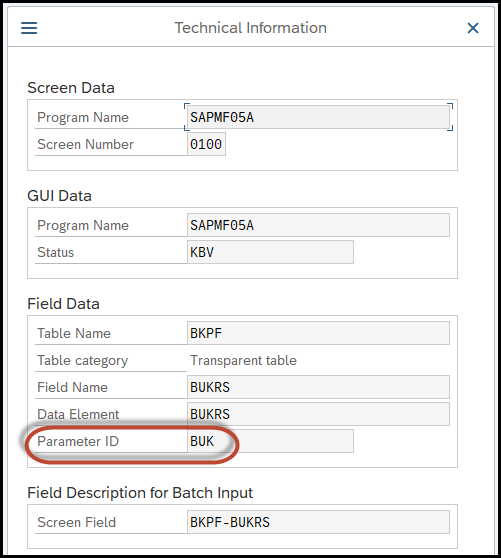
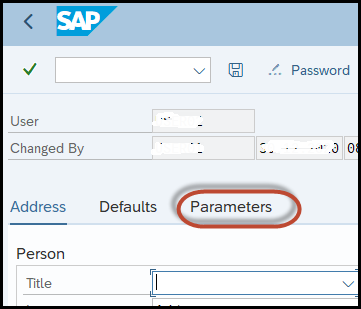
3) A small window will appear. Look at the field “Parameter ID” and write down the value that you see there. In this case, the value is “BUK”. Remember this for the following steps
4) Access transaction SU3 (Maintain User Profile) and click on the “Parameters” tab
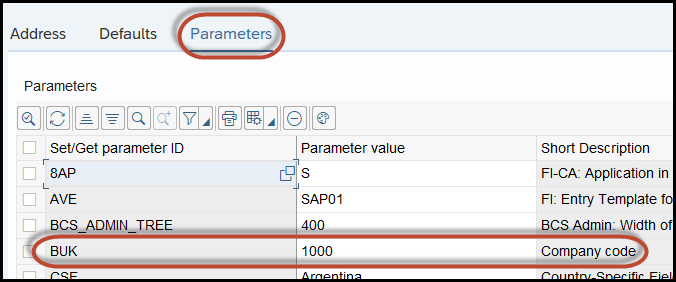
5) Go to the bottom of the list and firstly add manually the “Parameter ID” (“BUK” in our case) and then the value that you need to have as default for the Company Code (“1000” in this case)
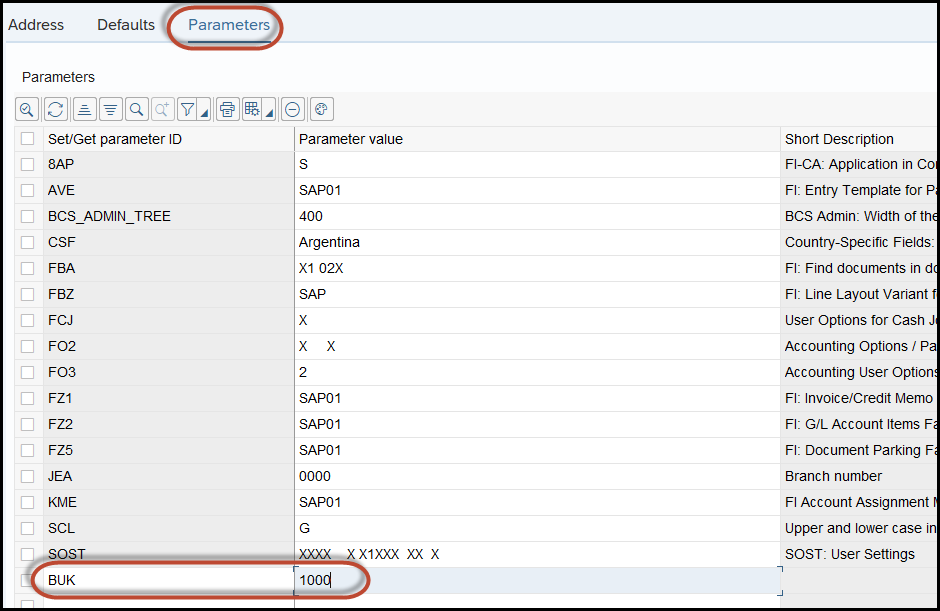
6) Save your entry

7) Be sure the entry is in your list after you save (search by alphabetical order)
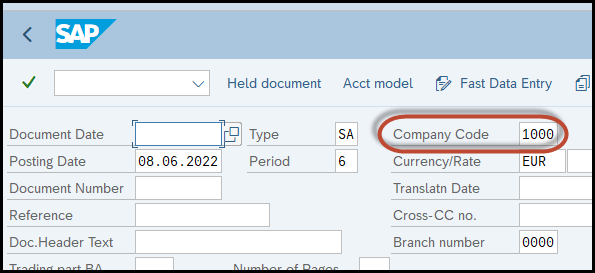
8) Logout, login again and enter the F-02 transaction again. You will see now that you have the Company Code already defined
Very easy, right? You just define it once and you save many minutes with this functionality.
Other useful fields to defined are “Controlling Area” (CAC), “Purchasing Group” (EKG), “Purchasing Organization” (EKO), “Business Area” (GSB) and many other that may apply to your daily operation. Just follow the previous fields to add them to your profile.
I hope this helps you!
How to turn customizing transactions into functional transactions
For sure, more than once you required certain transactions like OB08, OB52, OB58, OBB8, OBB9 and many others to be maintained frequently (also daily in some cases), which implicates many hours of customizing, transports, documentation and so on, to do all this in the Development environment, to test this in the Quality Assurance environment and for being used later in the Production system.
Well, the good news is that you can perform this in a more friendly way.
The whole details can be found in the OSS note 356483. It explains how certain tables or views can be set as “non-transportable” to convert them to functional objects. By doing this, the user can maintain these tables directly in the Production system, without the need of using the customizing or transporting the changes.
These changes must be performed by using transaction SE54. Before you execute the SE54 transaction, you need to know which the object is to be modified, since you will need to register this change in the OSS system.
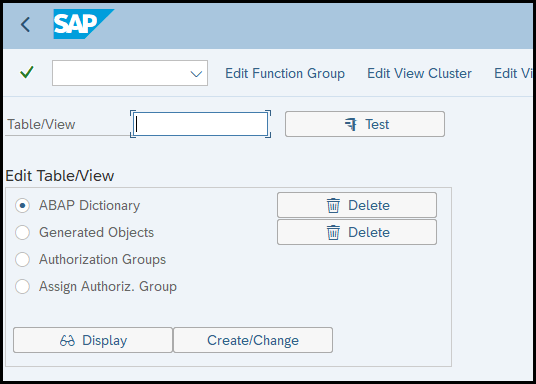
The modification to the specific object will be included in a workbench transport order. When you transport this order, the specific table adopts this new characteristic and allows the user to maintain it in the target system directly.
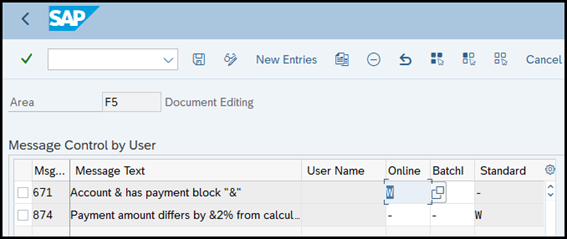
In some cases, depending on the modified table or view, you may also need to change the error messages properties in transaction OBA5.
Please consider that by performing it, by using transaction SE54, and by changing the table content in a specific system, you lose the configuration consistency between the different landscape systems for that table. That is why it is recommendable to perform the same changes in all the systems (Development, Quality Assurance, Production) at the same time.
I hope this helps you in your daily activities!