Learn how to configure an additional action and see the advantages of adding one.
Key Concept
Personnel actions are activities that involve a change of employment status or of employee master data. These activities could be hiring, promotion, transfer, pay change, disciplinary action, change of contract, or separation. You can use personnel actions to capture and update employee data for various employee events, and also change the employment status of an employee.
In a typical business scenario, you perform various actions for an employee — there may also be instances when you need to perform more than one action on the same day. For example, suppose you have performed a transfer action for an employee. Later in the day you are asked to perform a promotion action for the same employee. Now what happens if you perform the promotion action? The system doesn’t stop you from running another action, even though one action has already been executed on the same day. So when you perform the promotion action after the transfer action, the system deletes or overwrites the previously performed transfer action and saves the new promotion action. In addition, when you perform the second action, if there is a change in the employment status, then the system gives you an error.
The system gives out an error message because you cannot perform two different actions with the same begin date and each with a different employment status, as an employee cannot exist, having two different employment statuses on a single day. On any given day, an employee can have only one employment status. How can you perform more than one action on the same day without any action being deleted? The answer is that you need to configure additional actions. An additional action is a second action performed that does not overwrite the first action. Instead, it is stored in infotype 0302. Infotype 0302 is a log that has the details of all the actions run for an employee. This is required for the purpose of history, for audit, and also for reporting purposes. I’ll explain all you need to know about additional actions and how to configure them.
Additional Actions Overview
Before I explain how to configure additional actions, I would first like to give you more detail about these unique actions. The system can accept two records with the same date because for an additional action, there is no End Date — only a Start Date (Figure 1). An additional action is logged and saved in infotype 0302 without an End Date. Actions other than additional actions can also be shown and saved in the 0302 log, but are saved with an End Date. Take a look at the Action Type column. Here, the Additional Joining action is an additional action because the End Date is not specified.

Figure 1
Actions screen overview showing the log of 0302
You can configure any action that does not change the employment status (so, not a hiring action or a termination action) as an additional action.
Now that you know some of the properties of additional actions, let me familiarize you with the actions screen. Figure 2 shows the main actions configuration screen. You can get there by following menu path IMG > Personnel Management > Personnel Administration > Customizing Procedures > Actions > Set Up Personnel Actions, and in the resulting pop-up window, select Personnel Action Types. Alternatively, you can execute transaction code SM30, enter the table name T529A, and click the execute icon or press F8.

Figure 2
Personnel actions configuration screen
Here is the brief explanation for each of the columns.
- Column 1 (function character for action): Describe whether the personnel action is a hiring action (value 1), or not. Based on internal or external personnel number (PERNR) assignment, the system either generates the new PERNR, has the user enter a new PERNR in the next screen (i.e., action infotype screen), or prompts the user to enter a PERNR in the PA40 screen. It can also have the following values:
- Value 7 indicates that this is a recruitment hiring action with some basic data (applicant date) of the employee transferred from recruitment. For the applicant data to be transferred from Recruitment to Personnel Administration, the integration switch between Personnel Administration and Recruitment has to be active. You can activate this integration switch either from Personnel Administration (for which you can use feature PAPLI) or Recruitment (for which you can use feature PRELI).
- Values 8 and 9 are for the activation of personnel assignment in the host country and home country (i.e., for global employees)
- Value 0 is for all other actions
- Column 2 (STAT1 – customer defined): This is for any customer-specific status. You can access this value from Personal Calculation Rules and use it accordingly.
- Column 3 (STAT2 – employment): This defines the employment status applicable to the employee after the action has been performed
- Column 4 (STAT3 – special payment): This is for giving any status that you can use for defining special payments. You access this value from Personal Calculation Rules.
- Column 5 (feature for check action sequence): Some actions require that the features be matched with the subsequent action. For example, the features MSN20 and MSN21 match each other (as defined by SAP). That means that the system can run an action with feature MSN21 only after an action that has the feature MSN20 has been performed. You can only perform a rehiring action having feature MSN21 after a separation action that has the feature MSN20.
- Columns 6, 7, 8, 9: These check boxes control whether the position field (column 6), personnel area field (column 7), employee group field (column 8), or employee sub group field (column 9) can be edited
- Column 10 (infotype group number): Here you enter the infotype group number that links the infotype group created with the action screen
- Column 11 (date control): Set the values to either 1 or leave them blank. When you enter 1 here and then run the additional action with a date from the PA40 screen, it increases the date by one day in the Start Date field of the actions screen.
- Column 12 (U0000 — update 0000): Placing a check in this check box executes the action infotype and stores it in the actions infotype
- Column 13 (U0302 — update 0302): When you check this check box, the system executes the additional action infotype and stores it in the additional actions infotype
- Column 14 (country reassignment action): If this check box is checked, then it indicates a country reassignment and a new employee PERNR is generated
Configuration of Additional Actions
Now that you know more about the actions configuration screen, I’ll now explain how to configure an additional action. To begin, you must have the additional action screen up.
To configure an action as an additional action, perform the following three steps (Figure 3):
- Employment status column (column STAT2) has to be blank. By performing an additional action, the employment status for a person cannot be changed. This is a check defined by SAP. If you have any value here apart from a blank that implies that, after performing the action, the employee status will be changed. Any action that changes the employee status will not be called as an additional action. In other words, if STAT2 is not blank, then the system might store the record in 0302 but with an End Date, and when you perform any other action on the same day, the second action overwrites the previous action.
- Column U0000 has to be checked. If this column is checked, the action performed for an employee is saved in the actions infotype log. Infotype 0302 is effectively a subset of infotype 0000, so if you don’t check it the action will not be saved in infotype 0302 as well.
- Column U0302 has to be checked. This check box is to inform the system that the action needs to be saved in infotype 0302.

Figure 3
Action screen showing the required configurations for additional actions
Priority List for Personnel Action Types
Follow menu path IMG > Personnel Administration > Customizing Procedures > Actions > Set Up Personnel Actions and in the pop-up window, select Priority List for Personnel Action Types (Figure 4). Alternatively, you can execute transaction SM30, enter the table name V_529A_B, and press F8. If multiple additional actions are performed on a single day, then the Priority list defines which of these additional actions is logged in infotype 0000. For example, if two Additional actions are performed on the same day, then the additional action with a higher priority is listed in the 0000 log, and the additional action with a lower priority is displayed in 0302 log. However, if on the same day any other action is performed (apart from the additional action), then the action that is not an additional action is logged in 0000, and additional actions are logged in 0302, irrespective of the priority of the additional action. In this example, the additional action Add Joining Action has been given higher priority (Priority 1) than the Transfer and Promotion action.
Note
Only the actions configured as additional actions and no other actions appear in this table.

Figure 4
Priority list for action types
Figure 5 shows an overview of the actions screen. Even though the Transfer action has been performed first, the Add Joining Action is logged in 0000 and the Transfer action is logged in 0302. Both the Transfer and Add Joining Actions are configured as additional actions. This is because of the higher priority assigned to Add Joining Action, when compared to Transfer action.

Figure 5
Actions screen overview with multiple additional actions
Once you’ve finished these configurations, you then run report RPUEVSUP, which performs the following three activities.
1. There is a switch EVSUP under Group ADMIN in table T77S0 (Figure 6). The report updates the value of this switch to 1. You can also edit this value by maintaining the table from transaction SM30. This activates the additional actions.
Note
If the additional actions functionality is already active when you configure your additional action (i.e., the value for EVSUP is already 1), then you do not need to run this report.

Figure 6
Table T77S0 with switch EVSUP
2. It fills in the check box U0302 for all the actions in the actions screen (Figure 3)
3. It updates infotype 0302 for all the PERNRs selected in the selection screen with the actions that were performed for those employees. If no PERNRs are selected, then it updates all the PERNRs available in the system.
Actions 2 and 3 are required when you want a pre-existing, configured personnel action to be reconfigured as an additional action, and then to update infotype 0302 with all those actions that have already been performed for an employee.
Make sure the TEST check box is unchecked (Figure 7). Otherwise, the three steps mentioned above are not saved. Now execute the report by pressing F8.
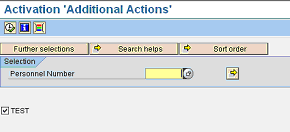
Figure 7
Report RPUEVSUP selection screen
Once executed, the report activates additional actions and updates data in infotype 0302. This report needs to be executed only once. There is no harm in executing it multiple times. The output of the report shows the number of employee records read and number of actions records read (Figure 8).

Figure 8
Output of report RPUEVSUP
Report Output — Explanation
In the report shown in Figure 8, note the following items:
- Test mode — I had executed the report in test mode
- Additional actions already active — in my example, the switch EVSUP is already active
- Additional actions update activated for all actions — The report checked the check box U0302 for all the actions in the actions screen (table T529T) (Figure 3)
- Number of personnel numbers read/Number of records read — The report shows the total number of employee PERNRs read (42, in this example) and the sum total number of records (total 51 personnel action records for 42 PERNRs) for each of these employees
Once you’ve run these configurations and the report, then the remaining steps are the same as for ordinary personnel actions:
- Creation of a reason for a personnel action
- User group dependency for the action
- Action menu — Inclusion of the action in the list of actions in the PA40 screen
Vamsi Mohan
Vamsi Mohan works as an SAP ERP HCM consultant. He has been working in SAP ERP HCM for the past seven years in various assignments. Vamsi has rich experience in time management, payroll, LSO, ESS, and has been part of many implementations. Prior to joining Accenture, he was associated with TCS, IBM, and Dell. Vamsi has a master’s degree in business administration.
If you have comments about this article or publication, or would like to submit an article idea, please contact the editor.