How to Build a Digital Assistant with SAP Conversational AI
by Bharath Nagaraj, Manager, Capgemini America Inc., and Anusha Saxena, Senior Consultant, Capgemini America Inc.
According to Gartner, a majority of white-collar workers (70%) will interact with conversational platforms on a daily basis by 2022. Enterprise chatbots function as digital assistants that help users get immediate responses for their queries and make decisions faster. SAP Conversational AI adds a human-like component to SAP technology and can improve user experience and employee perception, increase productivity, and reduce employee frustration without the need to rebuild applications.
This article provides step-by-step instruction on how to develop a chatbot using SAP Conversational AI, including how to build its logical intents and leverage different types of entities, integrate the bot with your SAP system, host it in Cloud Foundry environment on SAP Cloud Platform, approve purchase orders, and check information related to products, suppliers, and more.
Explore related questions
This article will also explore the multilingual capability of SAP Conversational AI and explain how to integrate your chatbot with Microsoft Teams to enable employees in an organization to conveniently chat with the bot through a common channel and leverage SAP Cloud Platform to host the NodeJS applications to ensure safe connection with third party systems. Lastly, this article will explain how to monitor the bot, improve the bot responses, and enhance its understanding of the user inputs.
Why SAP Conversational AI?
SAP Conversational AI is native to the SAP ecosystem and it integrates and connects with SAP solutions easily. SAP provides standard bots which can be enhanced, saving a lot of development time. Back integrations are simple and provides SSO capabilities which reduce the development and integration time with bots.
SAP Conversational AI is a powerful platform with an integrated development environment and natural language processing (NLP) technology that allows businesses to build, train and deploy chatbots with AI capabilities that can learn and adapt to the changing needs of customers and businesses, and requires less coding compared to other chatbot development platforms.
For these reasons we chose SAP Conversational AI as our platform to build a centralized enterprise digital assistant. It can connect to multiple SAP back-end systems, such as SAP S4/HANA, SAP ECC, and SAP CRM, as well as non-SAP systems, such as ticketing tools for example service now. The digital assistant simplifies tasks for the user in multiple ways, such as allowing users to complete their day-to-day tasks—such as self-service for managing products, approving purchase orders, and retrieving supplier information—by simply chatting with a bot without needing to log into any SAP systems or SAP FIORI launchpad. Users are also able to retrieve statistics of their purchase orders, suppliers, and product availability from the digital assistant without the need to run reports and drill down to the responses. The digital assistant can be available to users through any interactive channels such as Microsoft Teams and Slack.
What Are We Building?
We want to develop a chatbot that performs small talks with the user, allows the user to approve/reject the purchase order pending for approval, and allows the user to search the product information based on the following capabilities:
- The Chatbot should be able to recognize the small talk and respond to the user
- The Chatbot should be able to display its capability of handling type of intents upfront during small talk itself to give user an ease of interaction with the chatbot.
- The Chatbot should list pending purchase order, which we’ll achieve by building intent(s) to recognize user’s intention to get the list of purchase orders pending for approval and ask user’s choice to approve or reject the purchase order. The purchase orders reside in the SAP database and are accessible by Odata services in SAP ES5. Approve or Reject Purchase Order and let user know if the Purchase order is approved or rejected.
- The Chatbot should retrieve the product information. A product can contain a lot of information, so the chatbot should be able to ask questions of the user to narrow down the query to look for a product. In order to achieve this, we can prompt a user to provide a sequence of parameters that could be used to look for a specific product such as a product category.
Pre-requisites
Please create login in the following sites before beginning:
- SAP CAI – https://cai.tools.sap/
- SAP ES5 – https://sapes5.sapdevcenter.com/sap/bc/gui/sap/its/webgui
Guide to sign up on ES5 : https://developers.sap.com/tutorials/gateway-demo-signup.html
Steps to Create this Chatbot
You can create this chatbot by taking the following steps:
1. Create a New Bot
Go to website https://cai.tools.sap/ and register yourself with a SAP Service ID or GIT Hub.
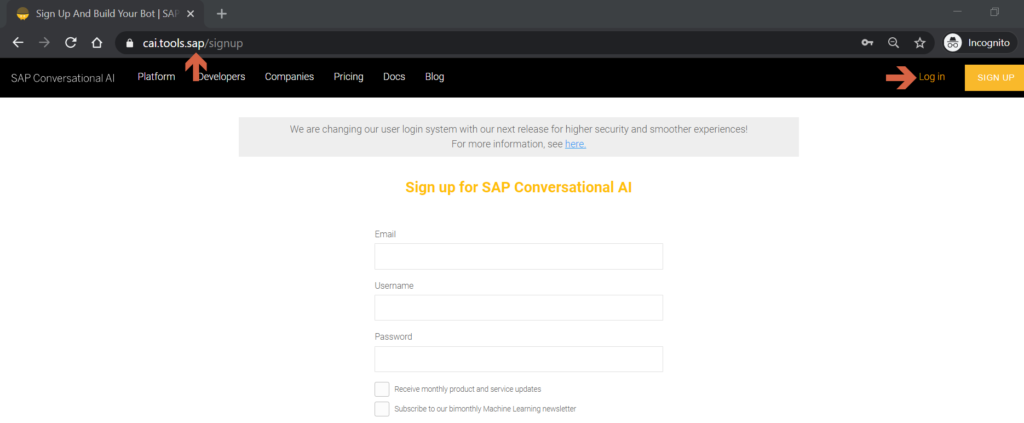
Figure 1—SAP Conversational AI registration
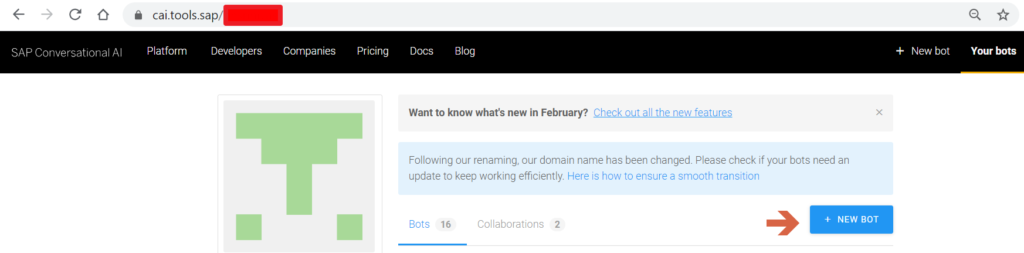
Figure 2—Create a new bot
Select the “Perform Actions” type chatbot.
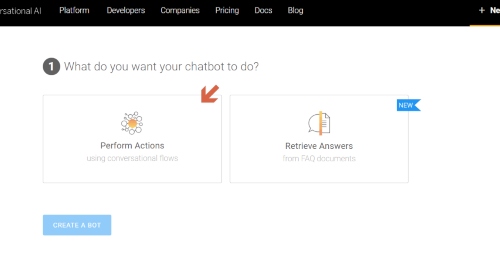
Figure 3—Create a conversational chatbot
Select the Greeting Skills.
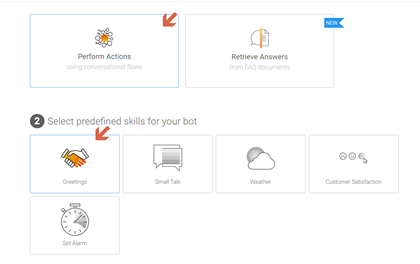
Figure 4—Select predefined skills provided by SAP Conversational AI
Enter the bot name and its description.
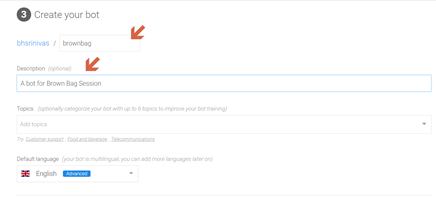
Figure 5—Enter bot name and description
Select “Data Policy.”
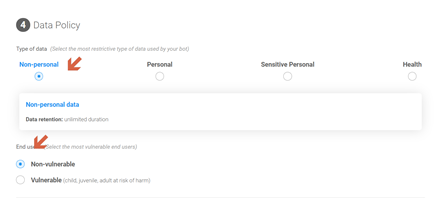
Figure 6—Data policy for the bot
Select bot visibility and click on “Create a Bot” button.

Figure 7—Bot visibility
2. Add Default message to Greetings Intent
The default intents – greeting and goodbye exist.
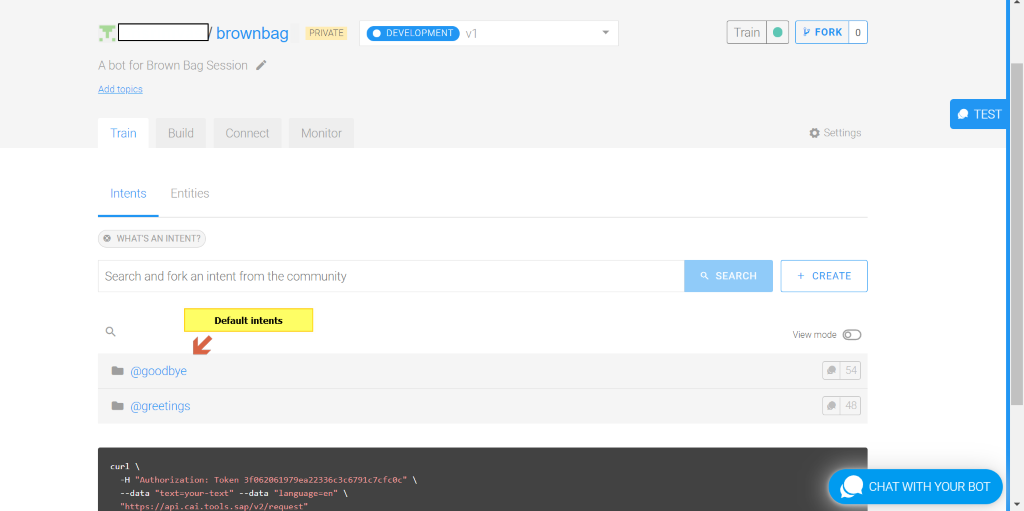
Figure 8—Default intents
To suggest chatbot capability to the user, update the greeting skill with suggestions to user and allow them to pick one. Go to build and select greetings skill.
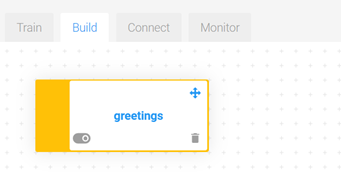
Figure 9—Greetings skill
Click on “Action.”
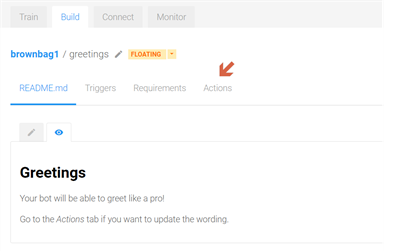
Figure 10—Select actions tab for greetings
Delete all existing responses.
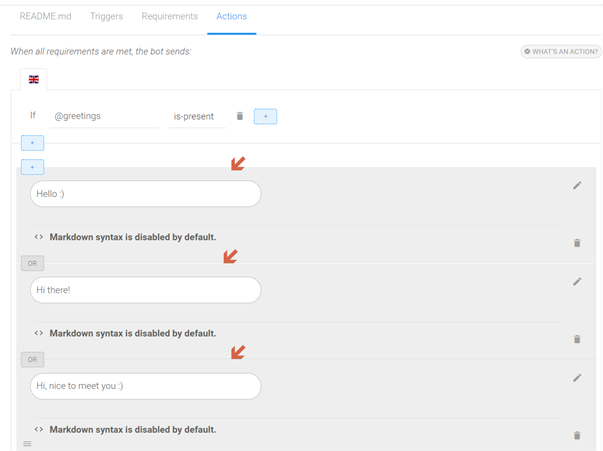
Figure 11—Greetings skill actions
Now add the response, as shown in Figure 12.
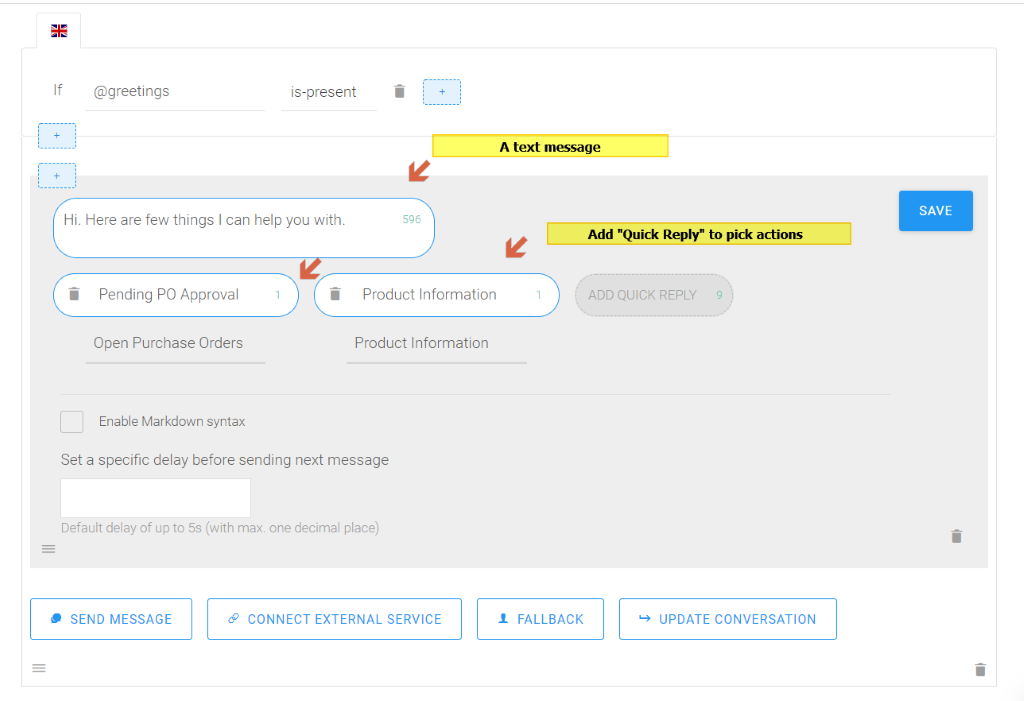
Figure 12—Update greetings skill with response
The response will look like Figure 13 after saving.
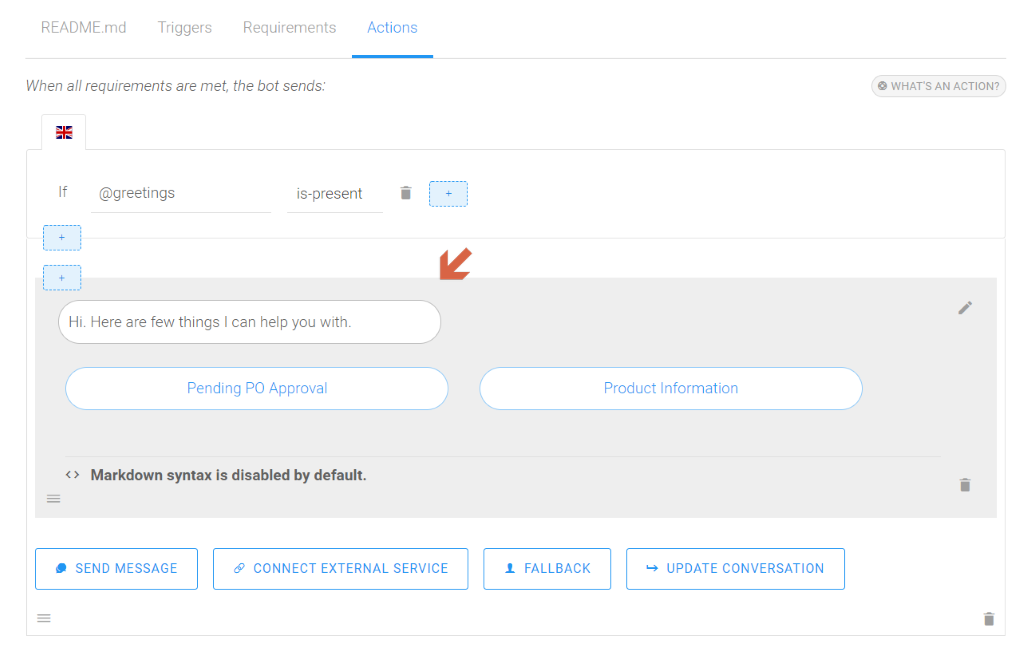
Figure 13—Updated greetings skills
Create entity #PENDINGAPPROVAL
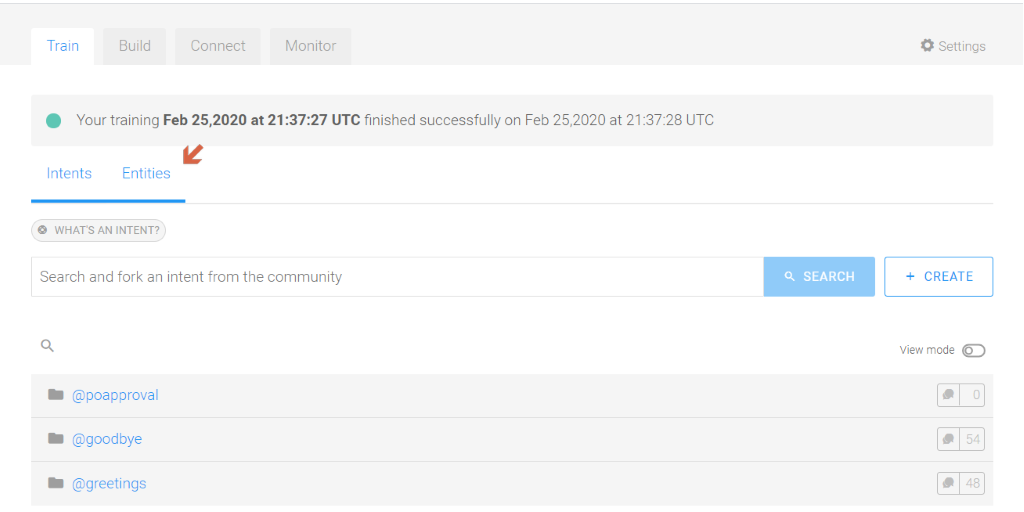
Figure 14—Create #pendingapproval entity
Type the name and select free entity type.

Figure 15—Free entities for pending approval
Click on the entity.
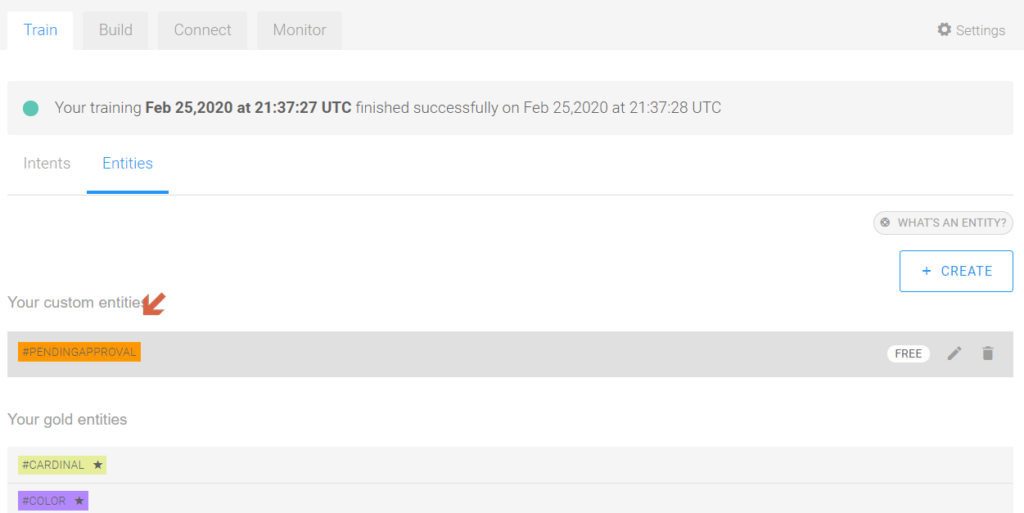
Figure 16—Entity created
Add the value “Open Purchase Order.” This value is set as action “Pending PO Approval” in greetings.
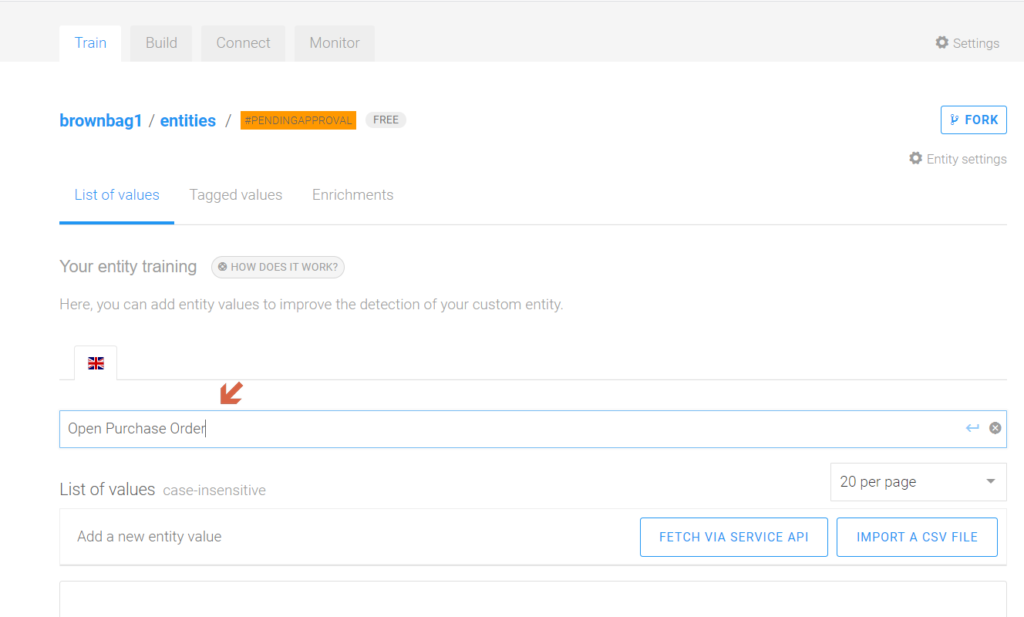
Figure 17—Possible list of values for the entity
Test the bot. Click on bottom right corner, “Chat with your bot.”
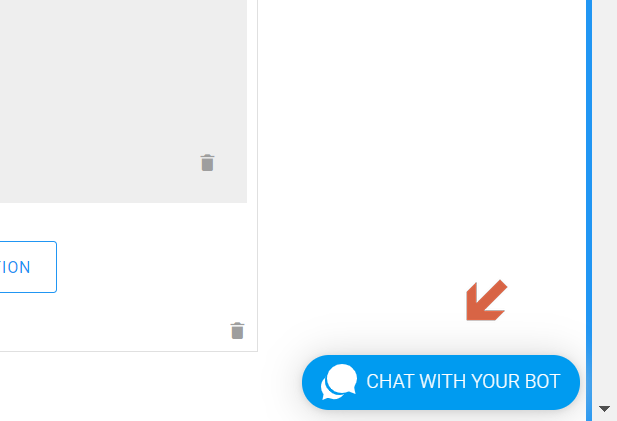
Figure 18—Test bot for the entity created
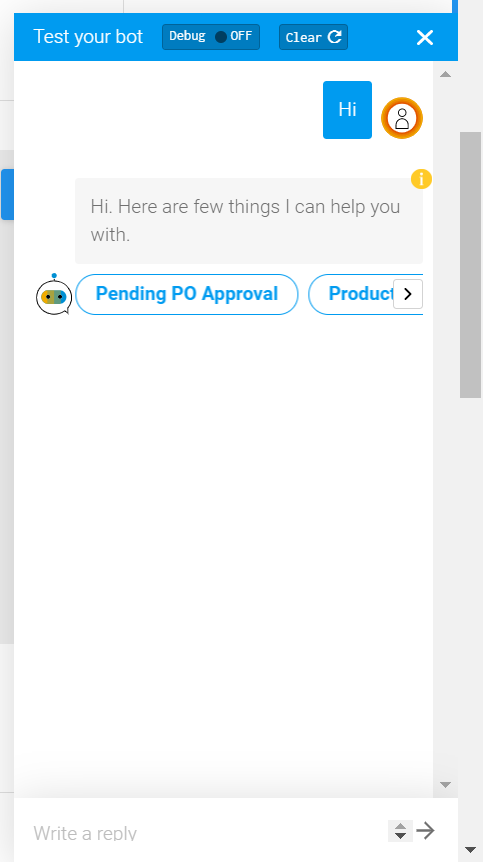
Figure 19—Test chatbot
3. Create Intents to recognize Action “Pending PO Approval” and respond to user’s intention to look for PO pending for approval.
Create new intent for PO approval.
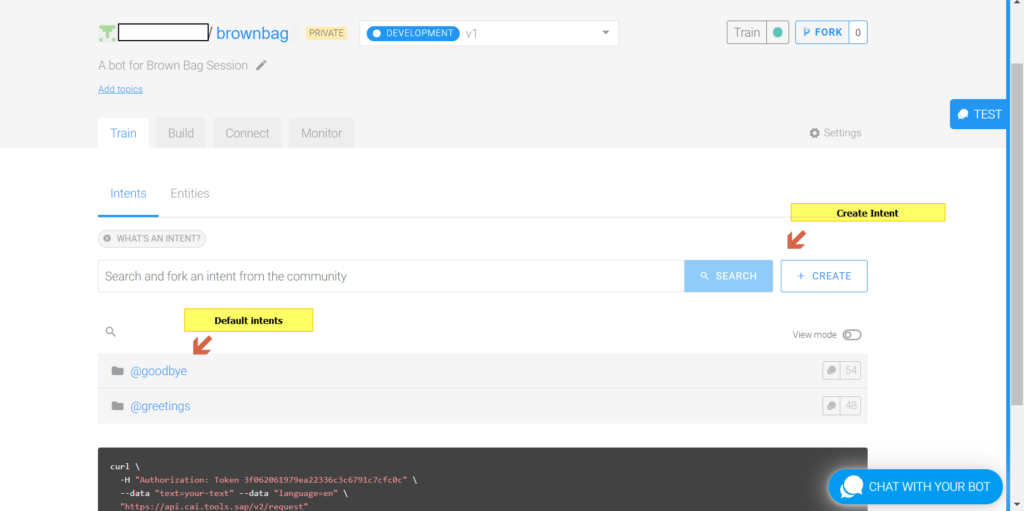
Figure 20—New intent for poapproval
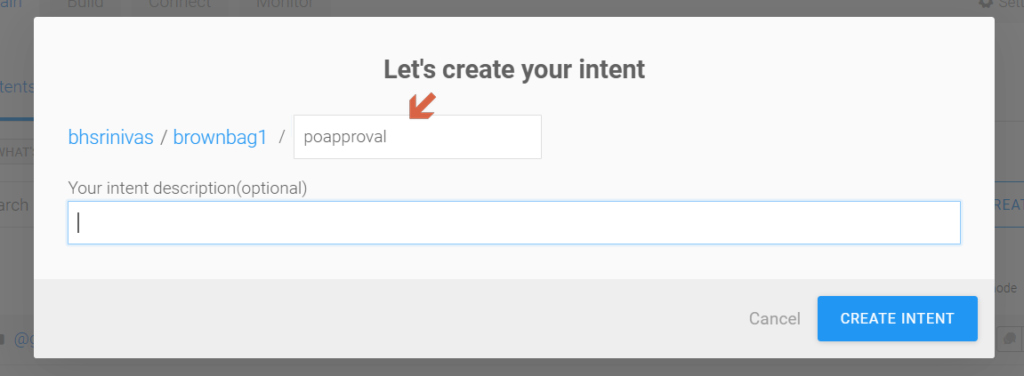
Figure 21—Creating poapproval intent
Click on PO approval intent.
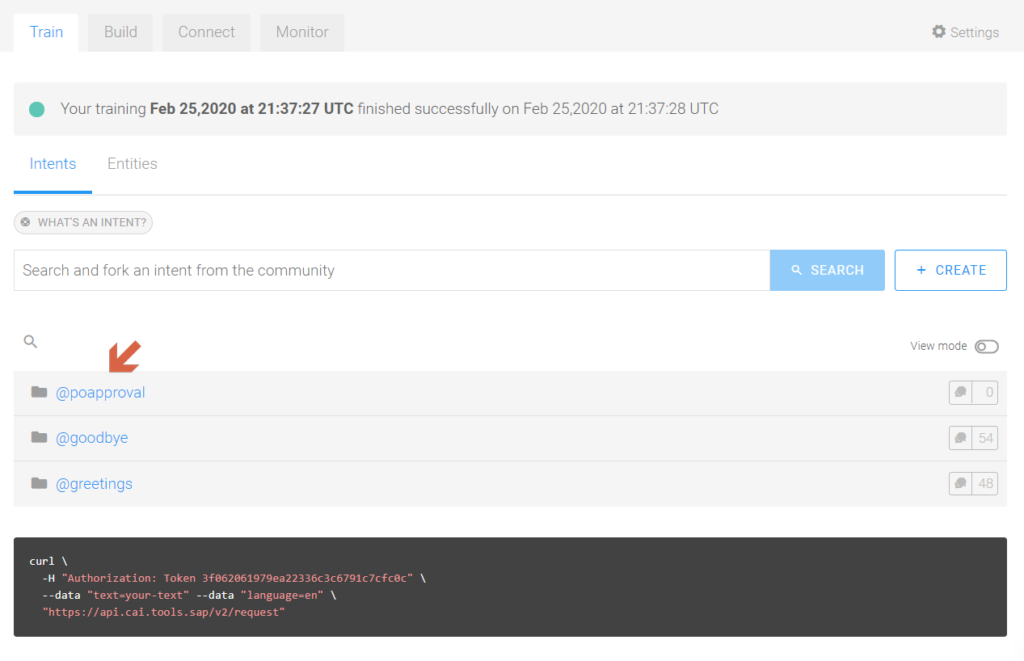
Figure 22—Navigate to the created intent
Add expressions to train bot to understand user intention.
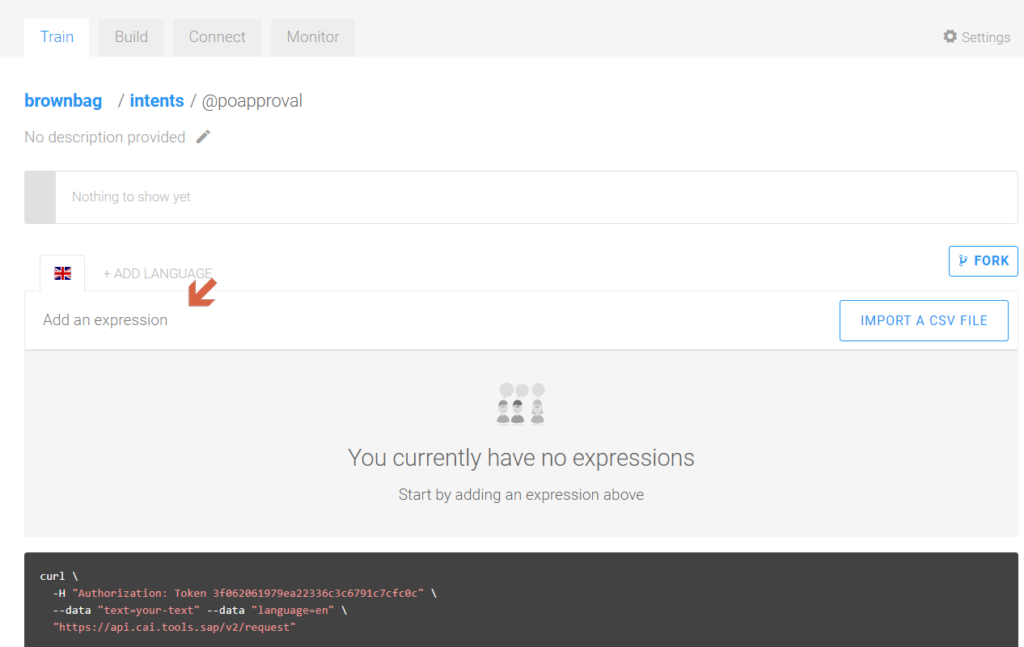
Figure 23—Add expressions to the entity
Type in the expression and press enter.
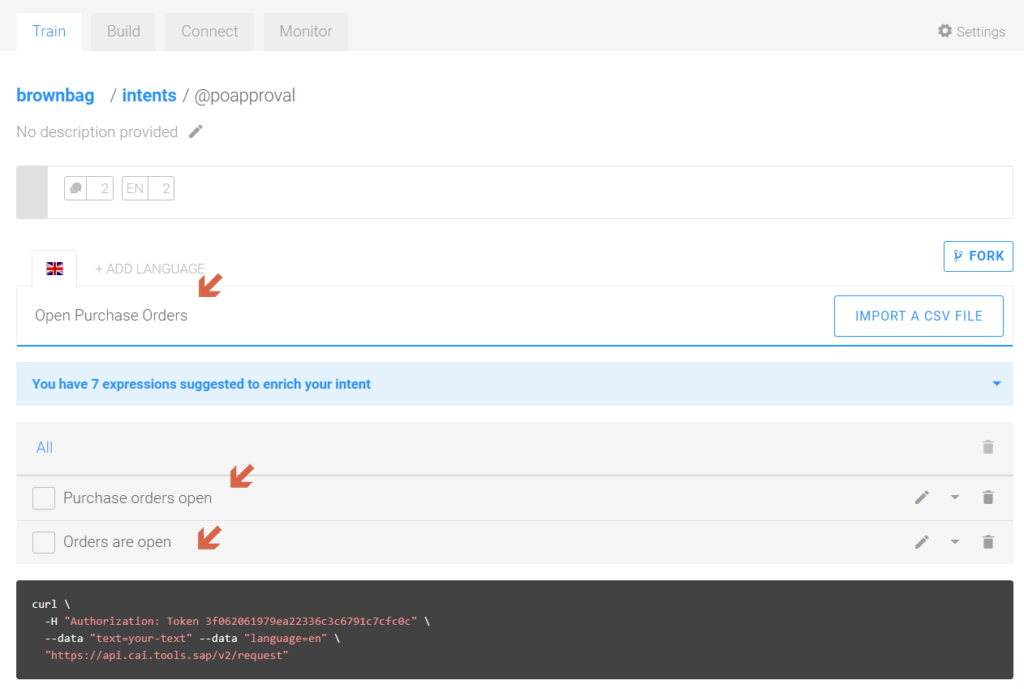
Figure 24—Enter possible intent values
Mark “Open Purchase Orders” expression as entity “#PENDINGAPPROVAL” when you expand this expression and select it.
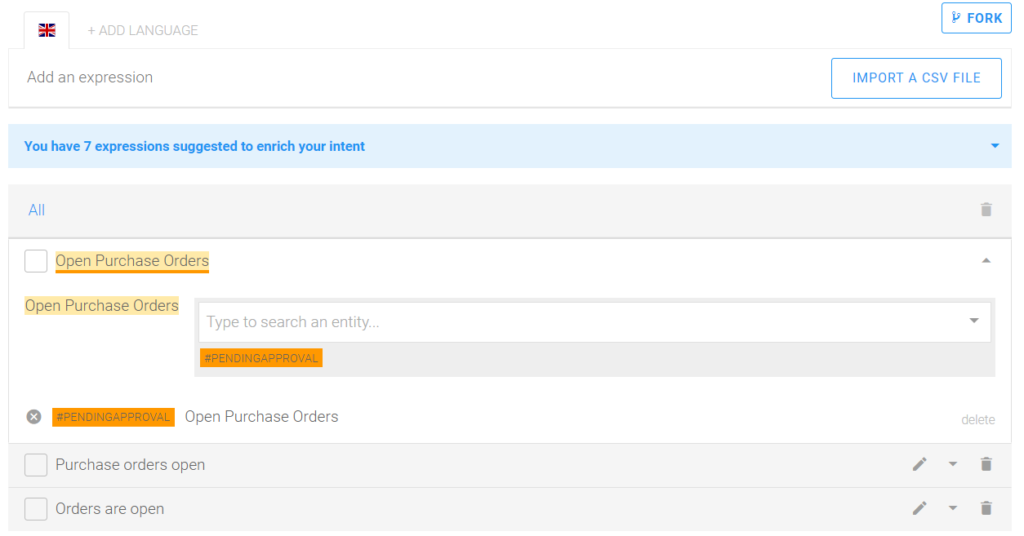
Figure 25—Intent created with possible values

Figure 26—Intent successfully created
Let’s go to “Build” and create a new skill.
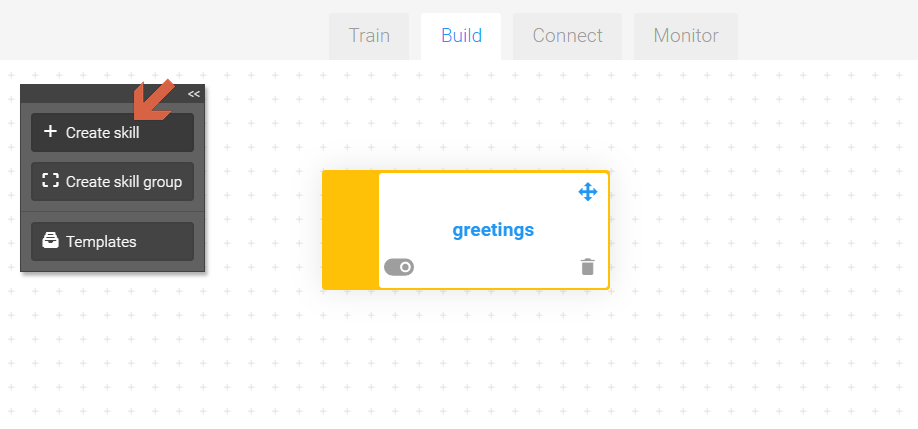
Figure 27—Create a new skill In BUILD
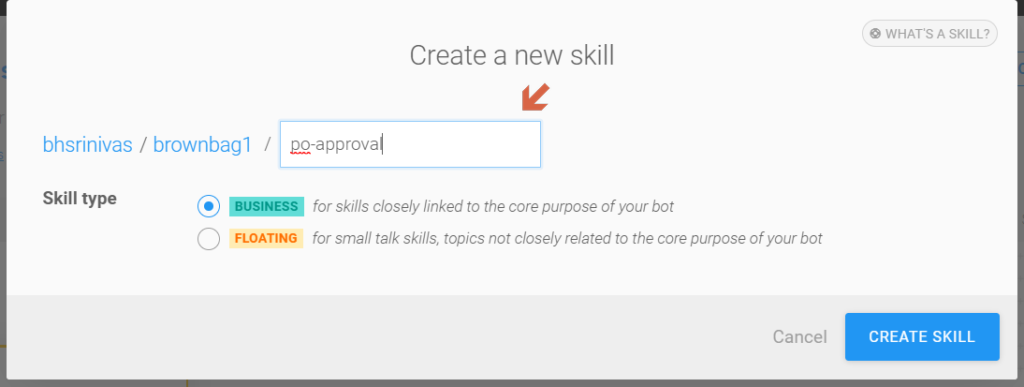
Figure 28—Create po-approval skill
Click on “po-approval” skill.
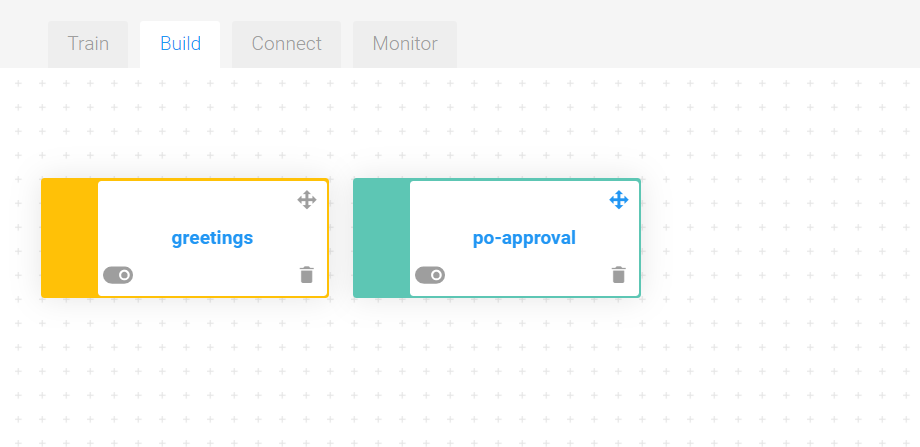
Figure 29—Skill created for po-approval
Enter the triggering condition as shown below. The triggering condition enables the Chatbot to identify when to trigger what skill.
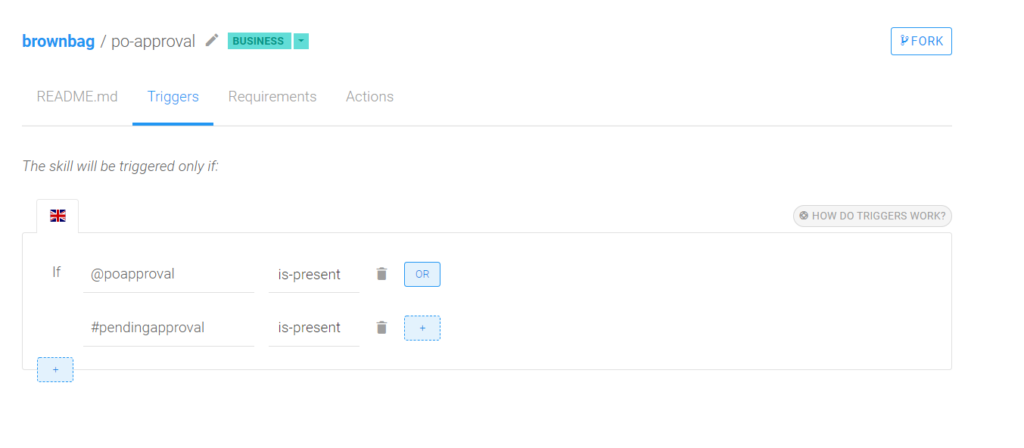
Figure 30—Intent trigger condition
Let’s go to the Action tab where we can call the Odata Service of SAP ES5 system to get the list of Open Purchase Order in SAP ES5 system.
Click on “Add new message group” button.
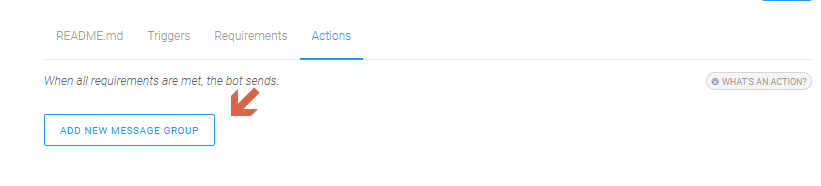
Figure 31—Add new messages for the intent to qualify
Place the external service.
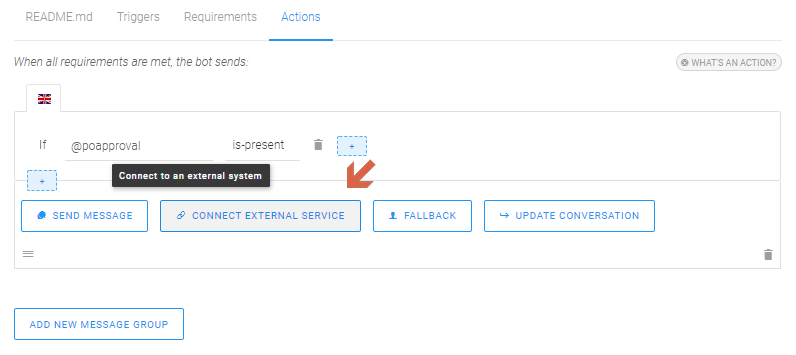
Figure 32—Connect skill to the API service provided by ES5
Click on “Connect External Service” button followed by “Consume API Service” button to call the ES5 Odata Service.
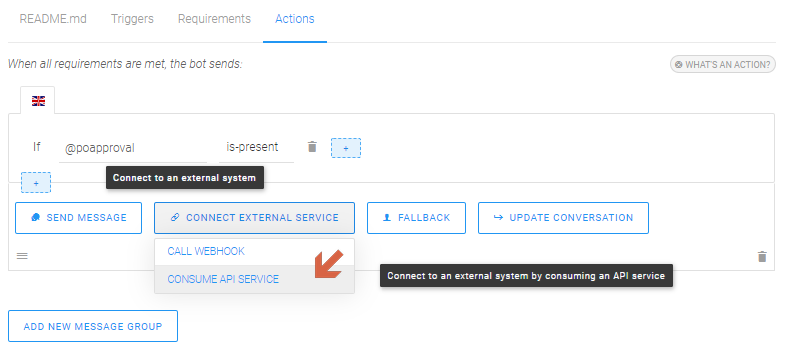
Figure 33—Connect with API service
Call SAP ES5 service. For now, we will just get the top four pending purchase orders for this tutorial due to current limitation of the tool to build the response message for list of multiple PO dynamically. This is, however, achievable by NodeJS application which can format the output message of Chatbot and display multiple PO dynamically in Chatbot. NodeJS application has to be hosted on SCP Cloud Foundry.
- Odata Service: https://sapes5.sapdevcenter.com/sap/opu/odata/sap/EPM_REF_APPS_PO_APV_SRV/PurchaseOrders?$top=4
- Method Call: Get
- Authentication: Basic Authentication, ES5 Trial ID and Password
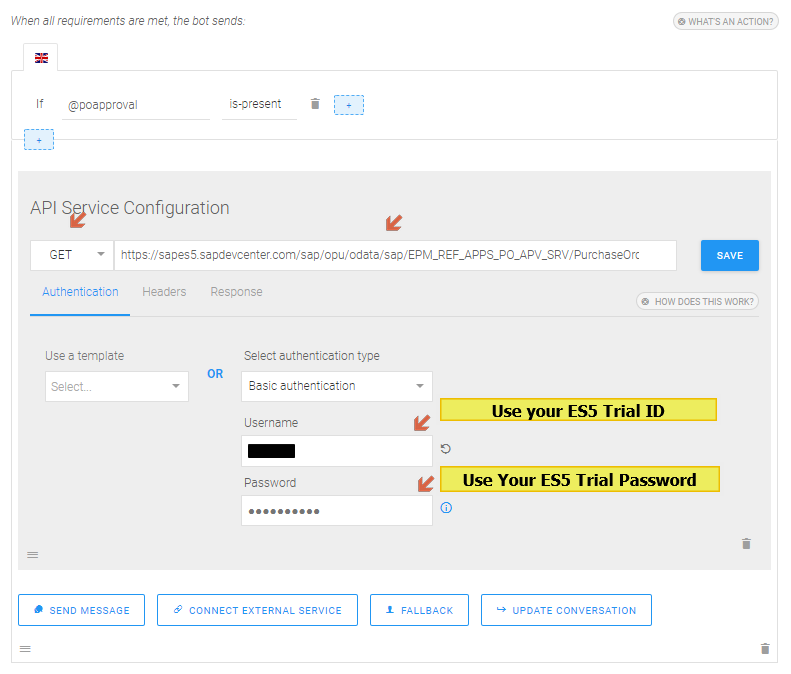
Figure 34—Configure Odata service with basic authentication
Go to the response tab and change the namespace from “value” to “result.”
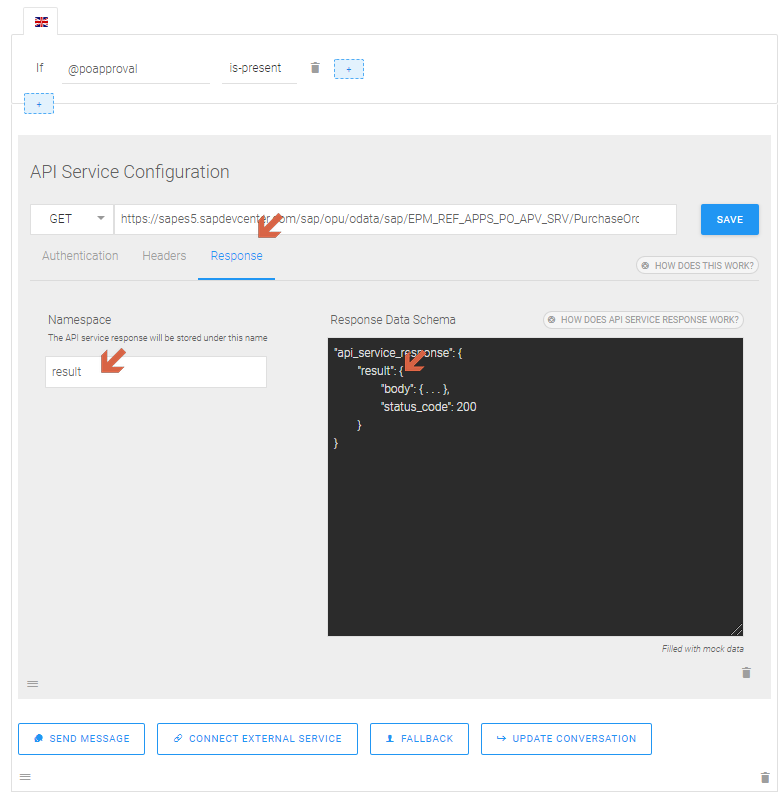
Figure 35—Configure response
Add message to reply with the list of Purchase Orders pending for approval after the call of service.
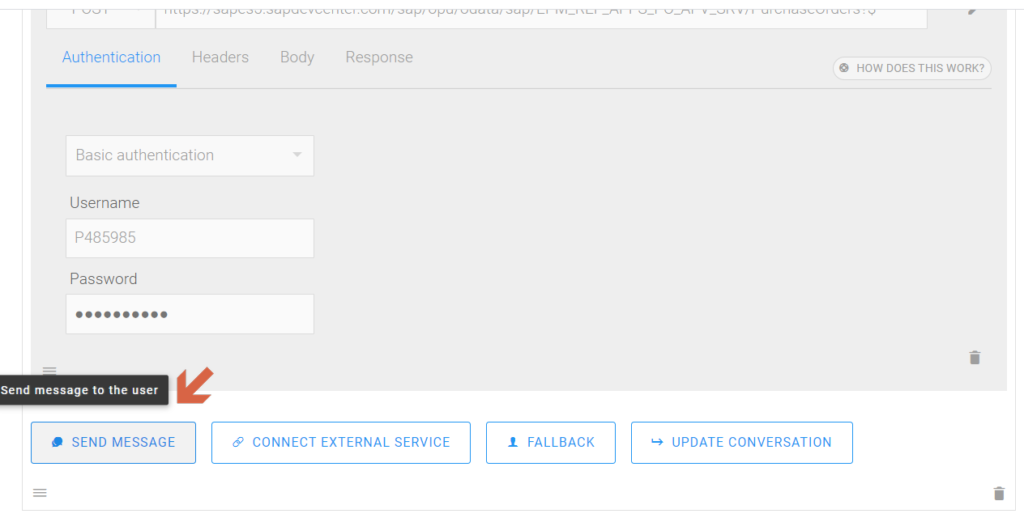
Figure 36—Formulate messages’ response based on result
We will select Message Type Buttons so that we can give option to user to approve and reject the purchase orders by clicking on respective buttons.
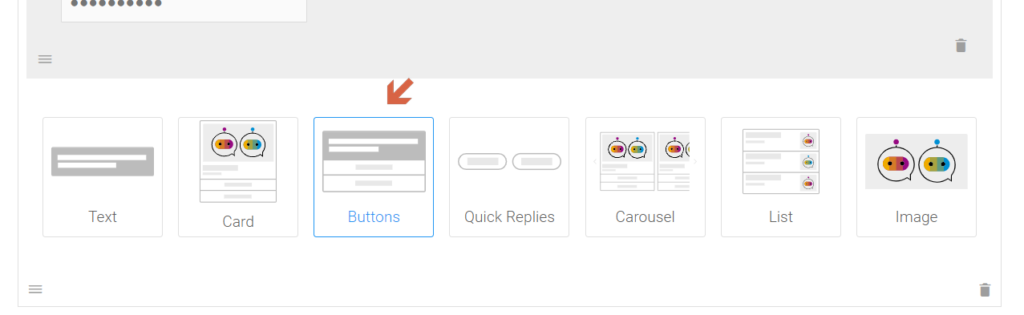
Figure 37—Add button message response
Add text to display Purchase Order number in the text. Purchase Order number of the service response can be accessed in memory of CAI api_service_response.result.body.d.results[].
Click on “Add a button” and select the type of button as Postback.
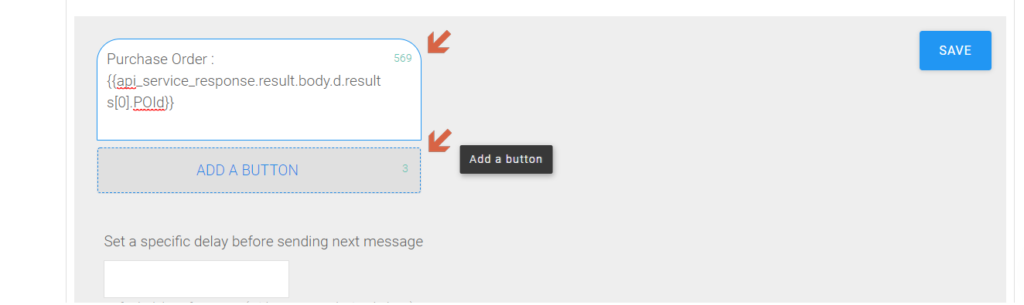
Figure 38—Add button with purchase order information
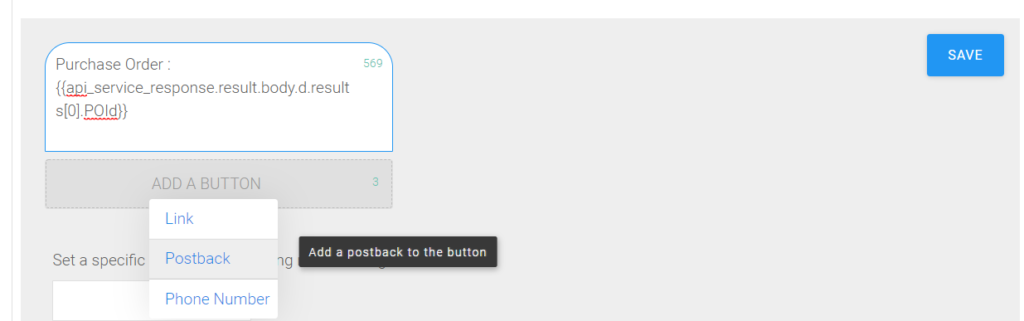
Figure 39—Add post back for button with purchase order
Type Approve as Button text and In the Postback Action type – Approve {{api_service_response.result.body.d.results[0].POId}}
This will trigger action Approve Purchase Order # which will be used to identify the Purchase Order # to be approved by the Chatbot.
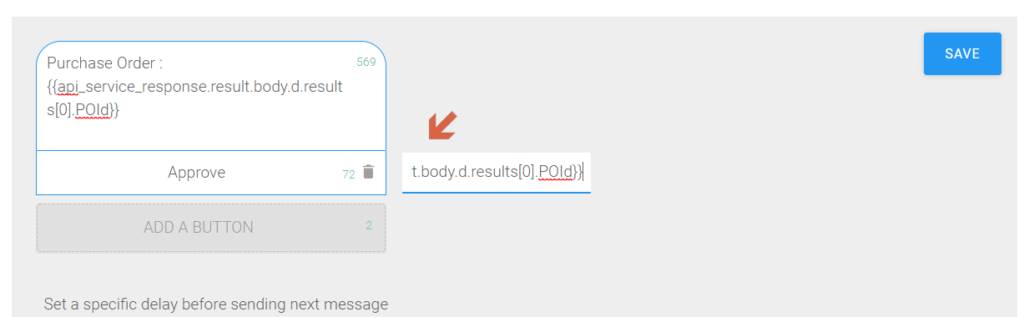
Figure 40—Update post back with purchase order ID
Add Reject Button.
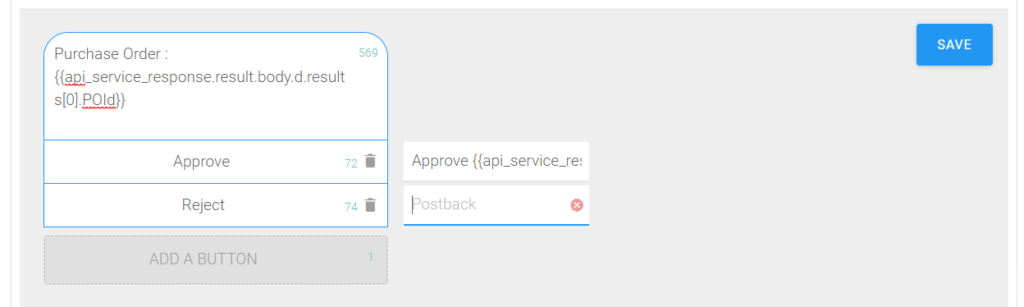
Figure 41—Add reject button for approval with postback
Add the Purchase Order # to be rejected in Postback – Reject {{api_service_response.result.body.d.results[0].POId}}
Click save.
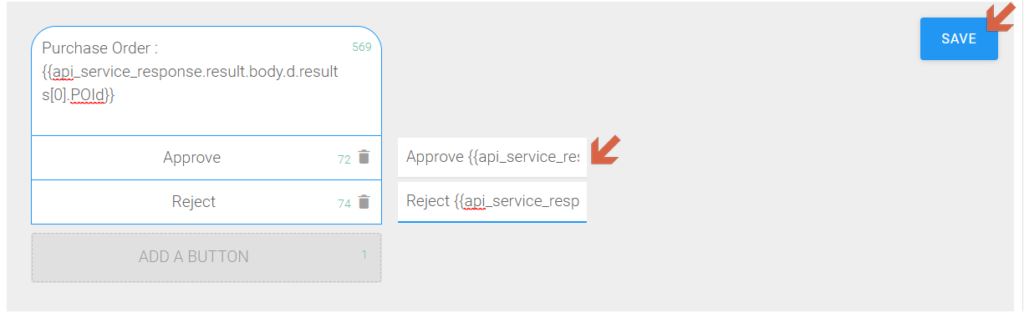
Figure 42—Save the button message
To display another Purchase Order in the obtained from service response, add another message with Message type button.
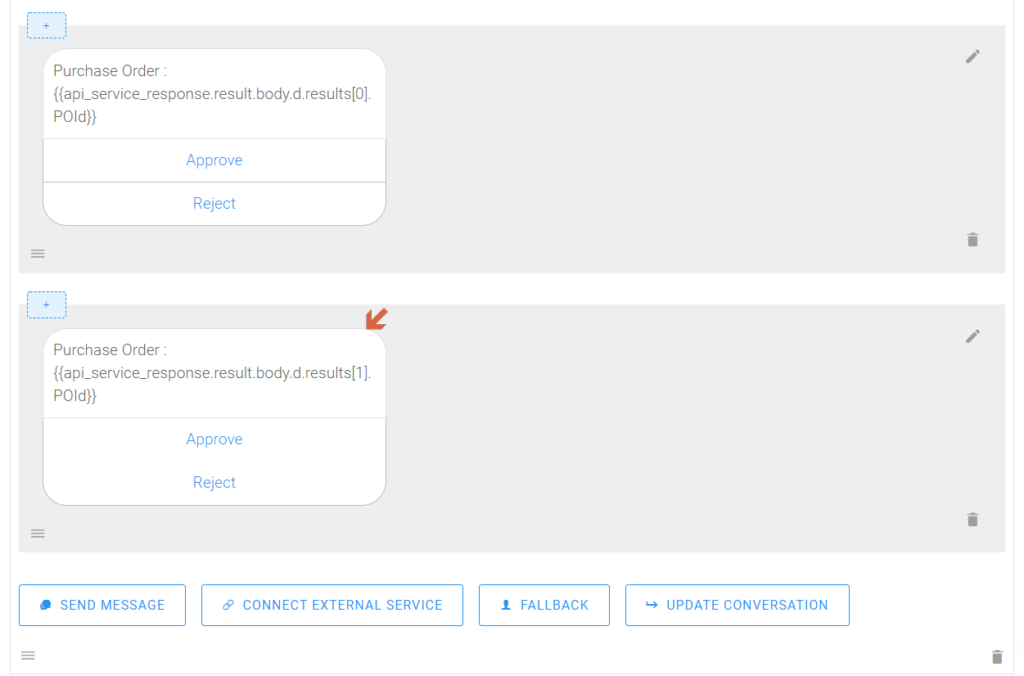
Figure 43—Repeat button creation for multiple purchase orders
4. Create Intents to recognize Action “Approve” / “Reject” and respond to user’s intention to approve or reject the listed PO
Now we need an intent for to understand if the user intends to approve or reject.
Create an intent – @approve-reject-po
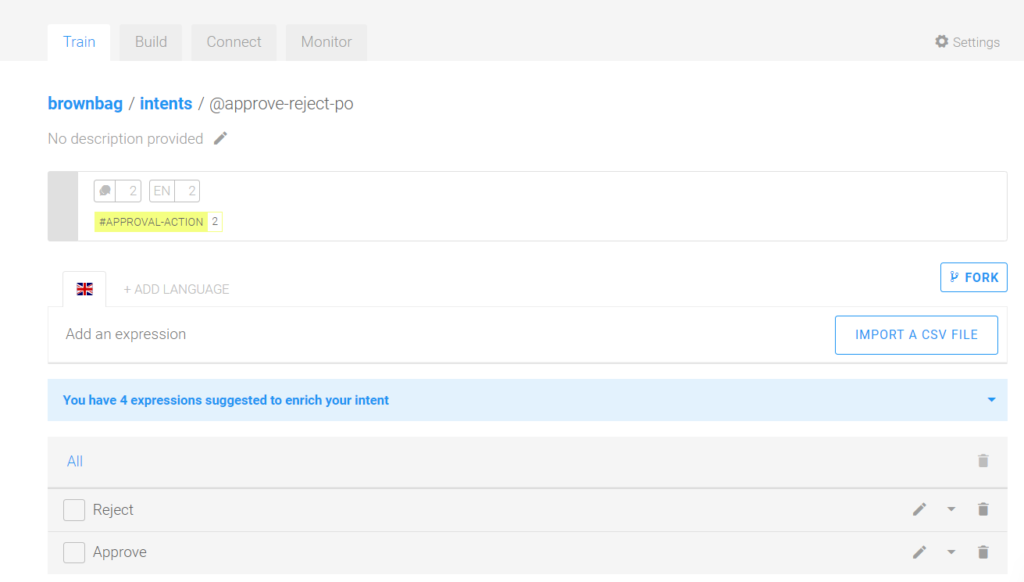
Figure 44—Create intent for purchase order approval/rejection
Add entity #APPROVAL-ACTION to detect whether the action is to approve or reject.
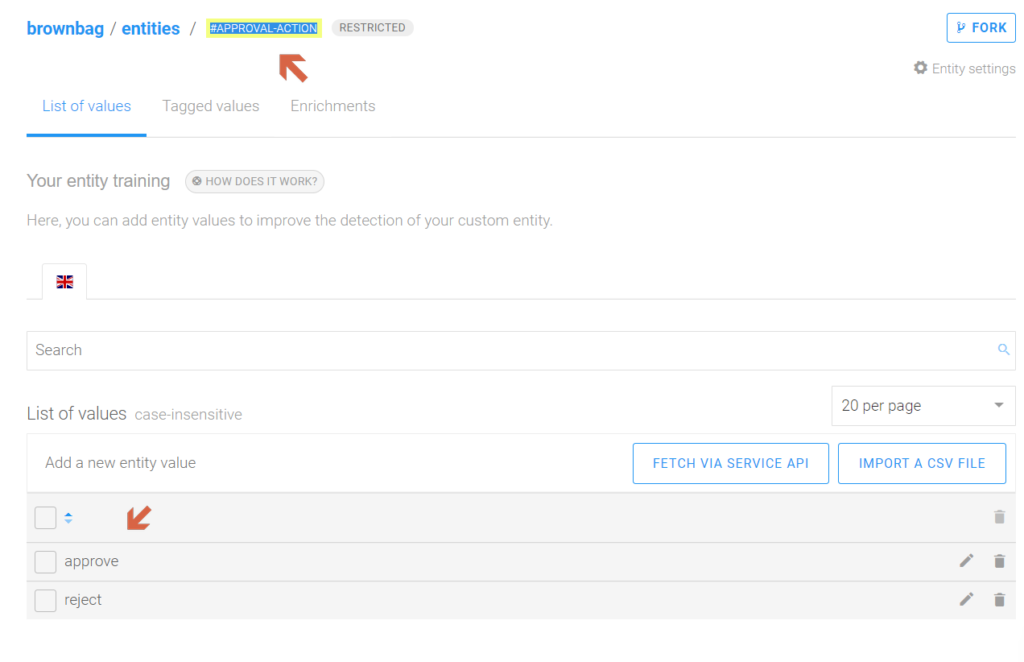
Figure 45—Add expression to the intents
Add expressions “Approve” and “Reject” in intent @approve-reject-po
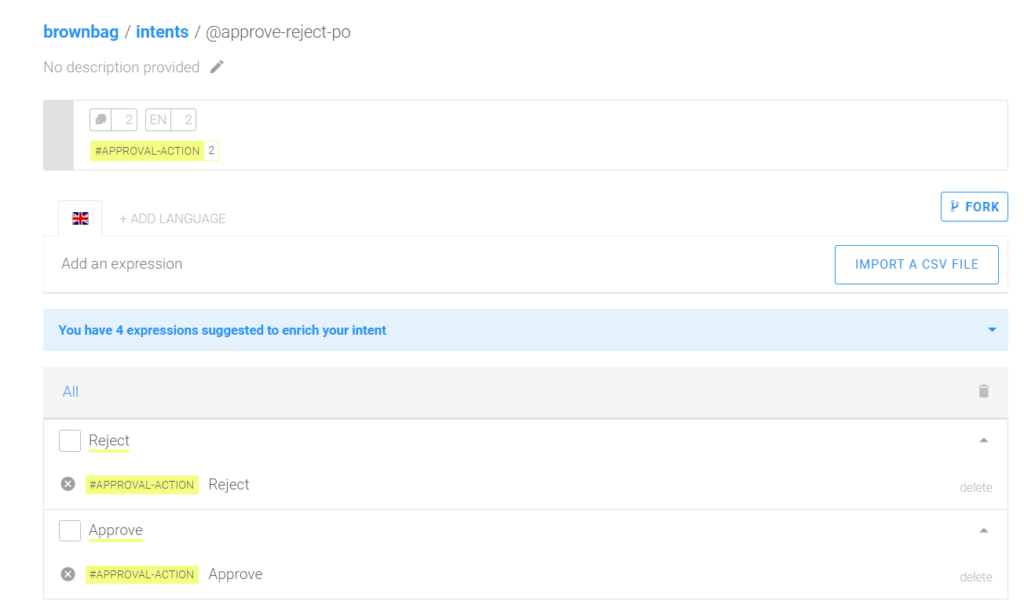
Figure 46—Enrich the intent
Add skill approve-reject-po to build.
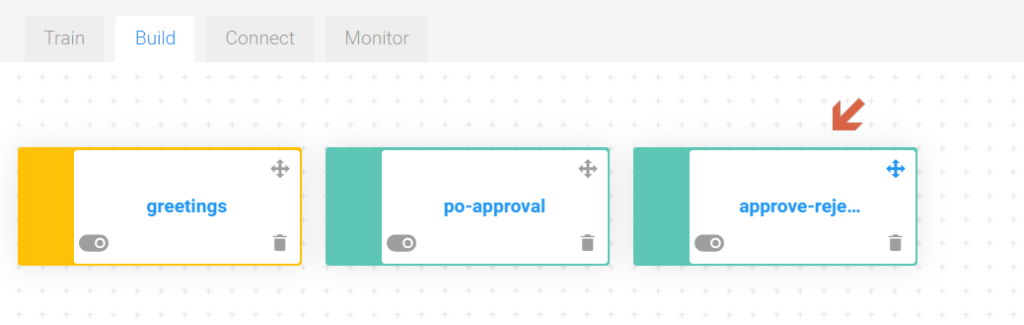
Figure 47—Create skill to approve/reject PO
Add triggering condition to the skill as shown in Figure 48.
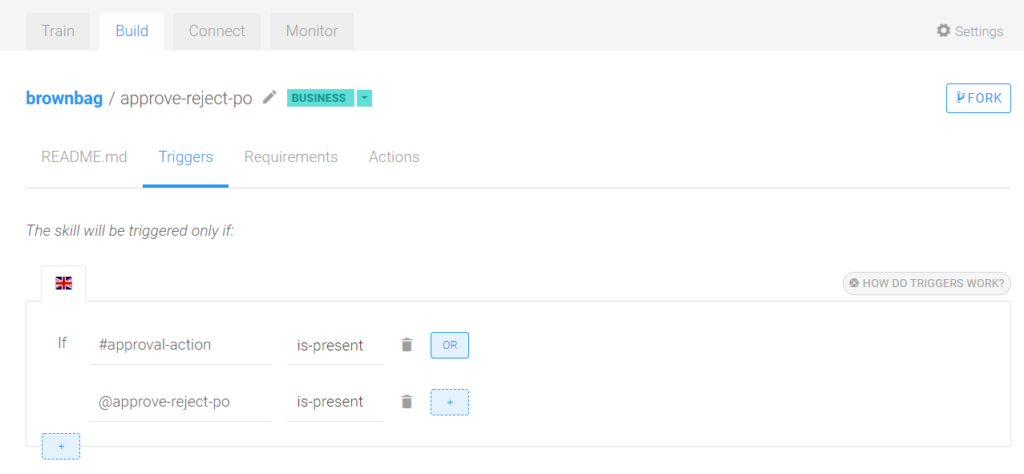
Figure 48—Enter trigger condition
Now, let’s update the Action tab with response to Approve and Reject Action.
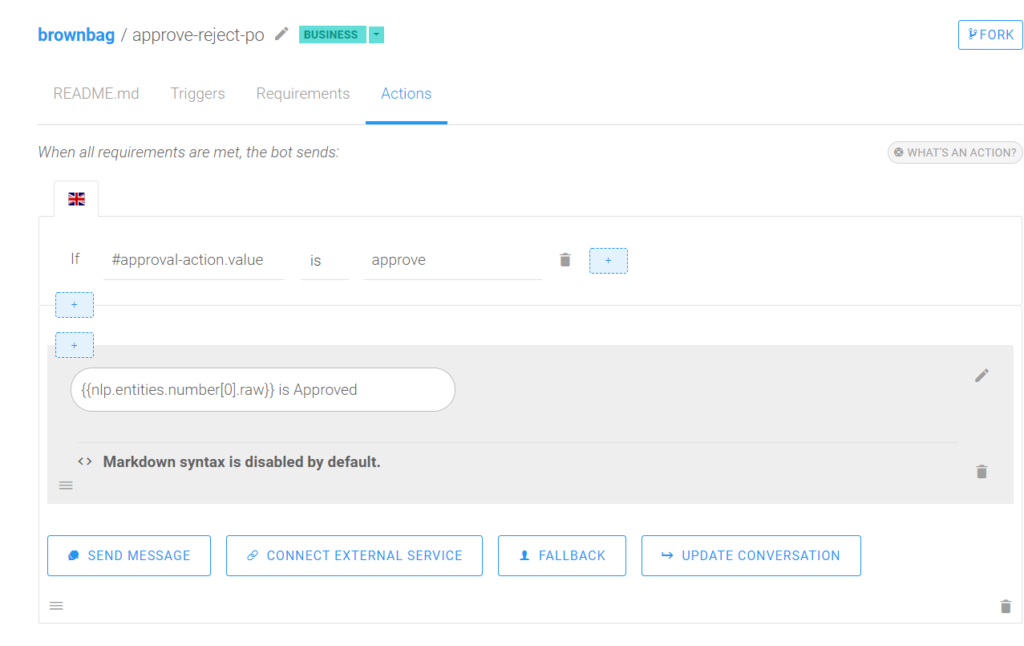
Figure 49—Implement actions based on the intent
Next, test the skill.
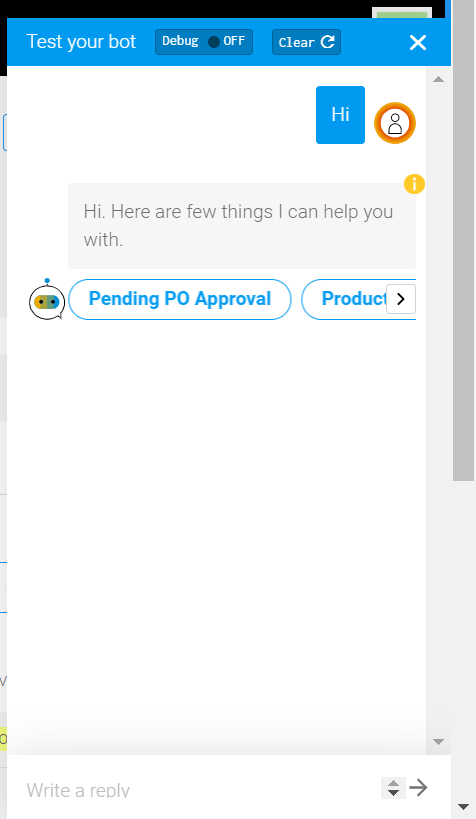
Figure 50—Test skill
Click on “Pending PO Approval.”
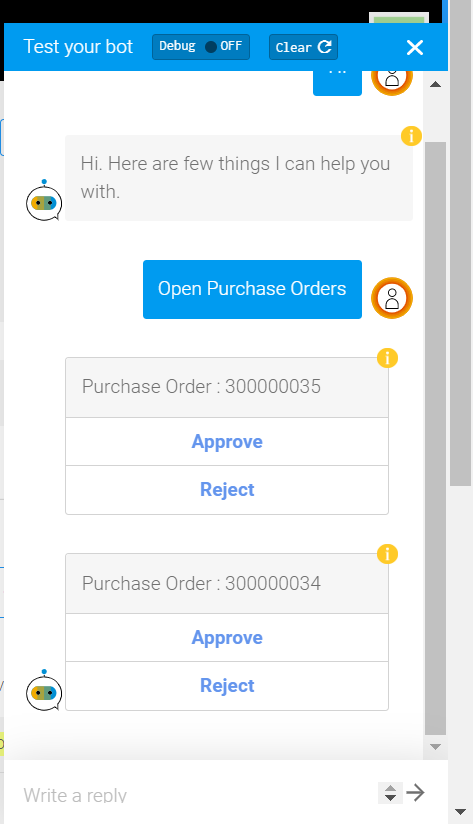
Figure 51—List of open purchase orders
Click on Approve and PO 300000035 will be approved.
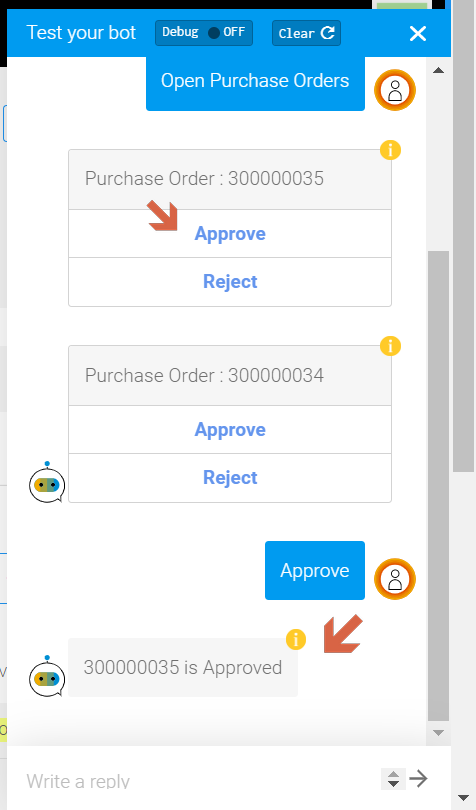
Figure 52—Chatbot works as expected
5. Create Intent to recognize Action “Product Information” and respond to user’s intention to look for Available Product information
Add intent @product-information to train the bot to understand user’s intention to know the product availability information.
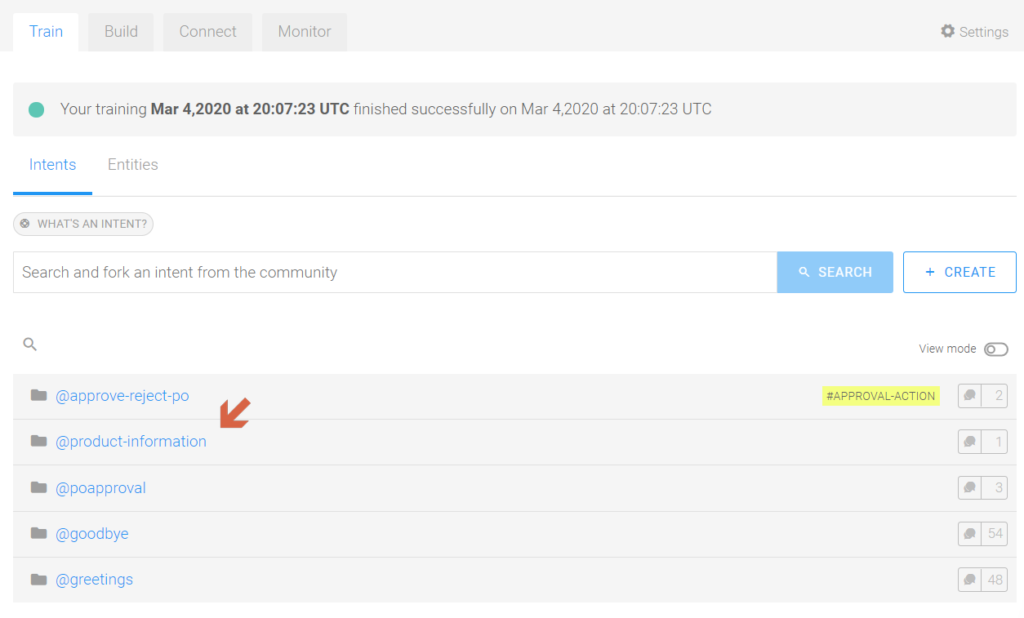
Figure 53—Create Intent for product information
Add expression to the intent, which is the same as the action defined in “Quick Reply” in Step 1 for the product information option in the greetings.
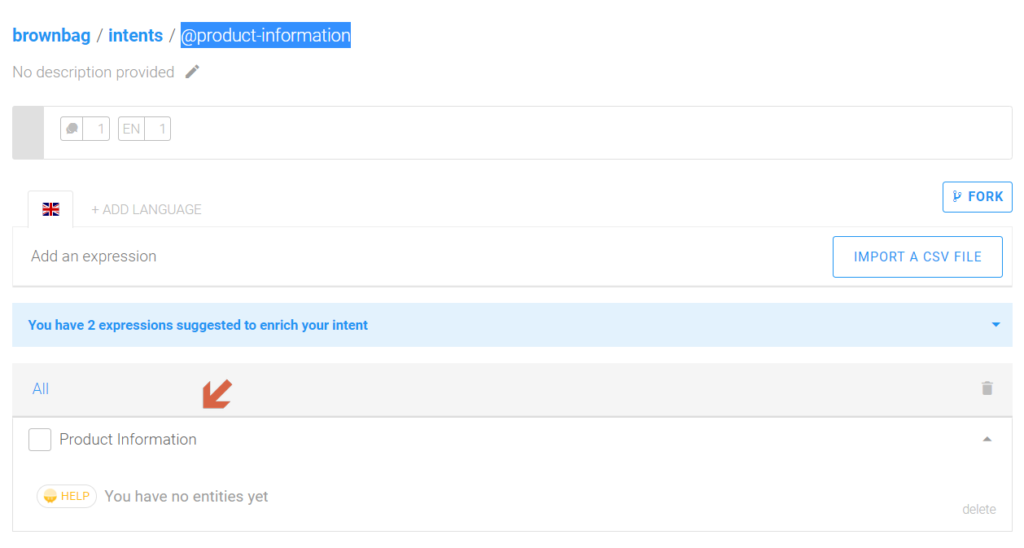
Figure 54—Add expressions for @product-Information intent
Add skill product-information to the bot.

Figure 55—Create a new skill for fetching product information
Add the triggering condition.
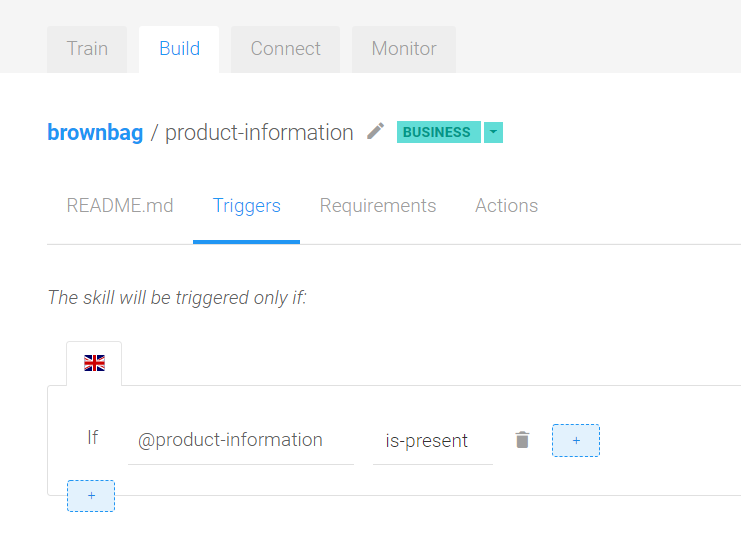
Figure 56—Enter the trigger condition for product-Information skill
To narrow down the user’s requirement and product search further, we can add criteria for user to select a category of Product that they are looking for. To achieve this, let’s create an entity that recognizes Product Category in the user’s ask or actions. For now, let’s maintain only notebooks, pdas & organizer.
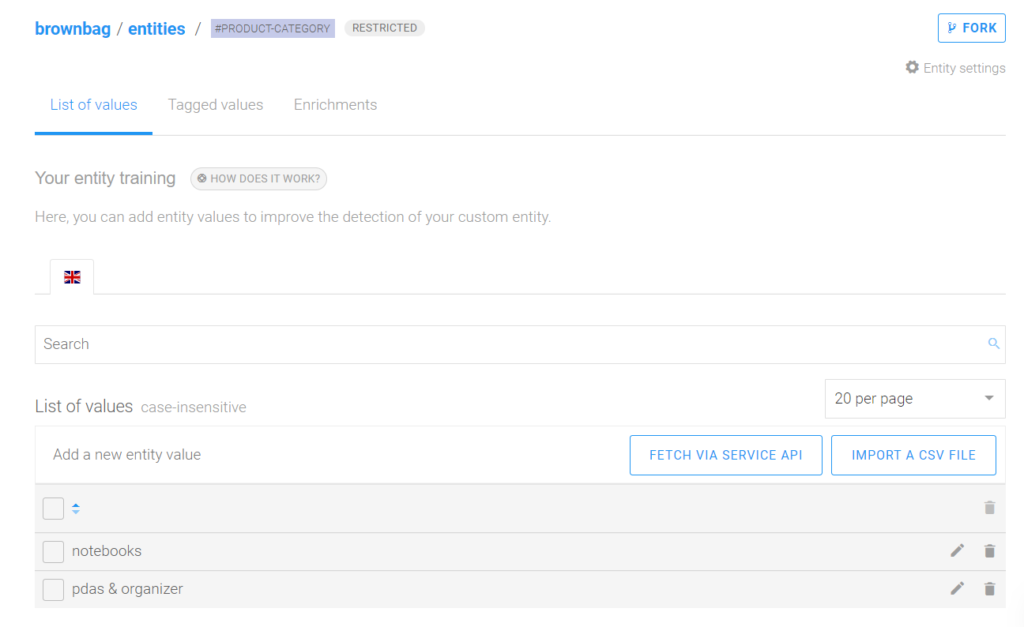
Figure 57—Create entity for categories
Check in requirement of skill to check if the category is missing when this skill is triggered, to ask user to select a product category that they are looking for.
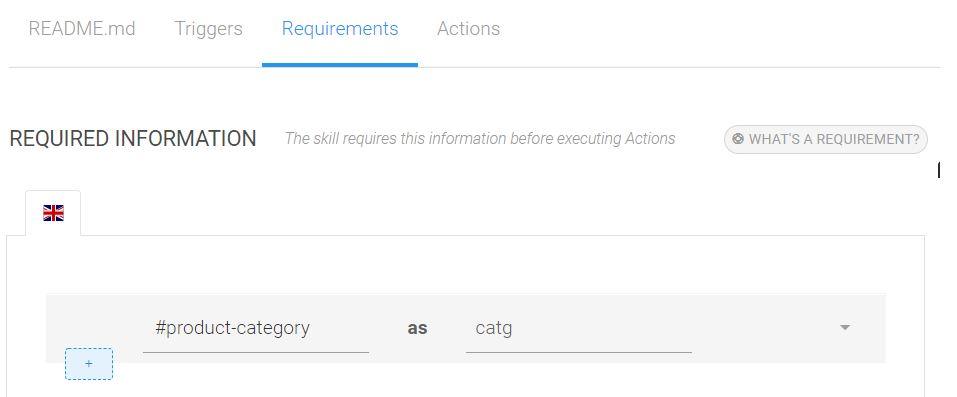
Figure 58—Add requirements to the skill
Click on New Replies to add message when the Product Category is missing.
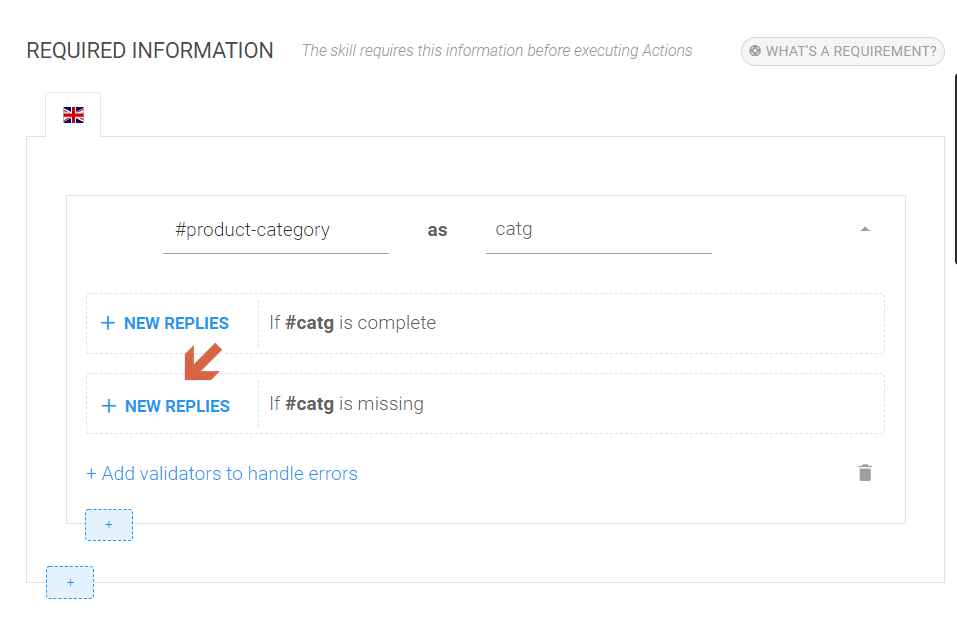
Figure 59—When the category is not entered send response to user
When the product-category entity is missing, send message to user to select a category. Giving users the chance to choose an option restricts user to remain in the scope of the Bot Purpose.
Add buttons to display Product Category options to user.
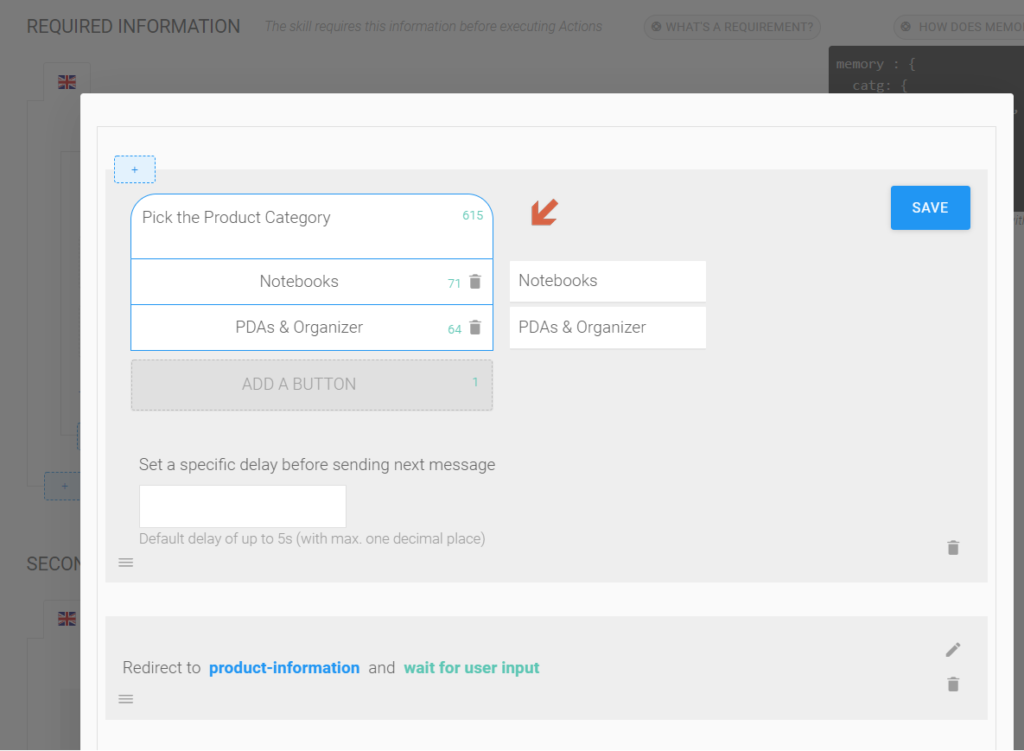
Figure 60—Create replies when category is missing
Once the user selects a category, we can display the product list found for the selected product category using Odata Service EPM_REF_APPS_PROD_MAN_SRV in ES5 system.
Let’s navigate to the actions tab and create a API Service call to link:
https://sapes5.sapdevcenter.com/sap/opu/odata/sap/EPM_REF_APPS_PROD_MAN_SRV/Products
- Method: Get
- Authentication: Basic Authentication
- Username: Username / Trial ID in ES5 system
- Password: ES5 Trial ID/ User password
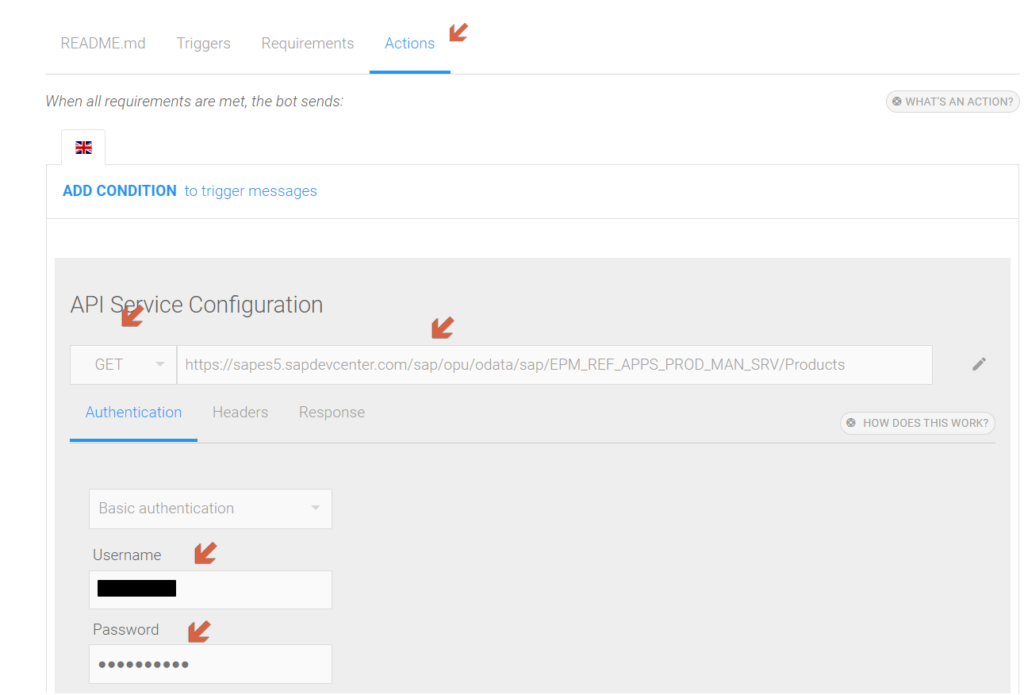
Figure 61—Create action to fetch products
Let’s navigate to header tab in API service Integration and add query parameter SubCategoryId = Product Category selected by user to filter the output list based on product category.
To access the user selected Category value, access the entity value in memory – {{memory.catg.raw}}

Figure 62—Prepare the API service call with the category
Change the response from “value” to “result.”
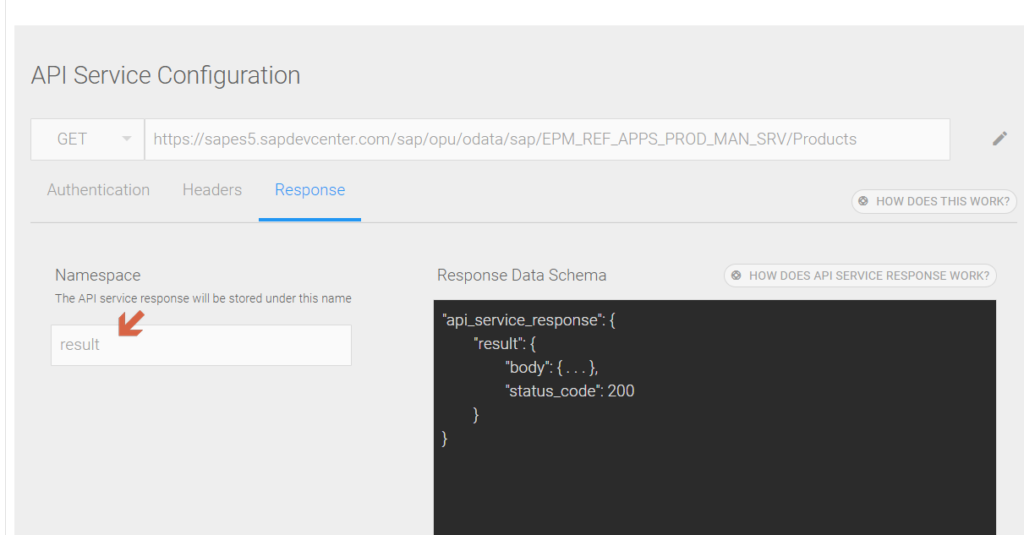
Figure 63—Get response for the API call
To display the service results with Product List add a message after the Service Call.
The response of service is in the array of {{api_service_response.result.body.d.results[]}} which can be accessed in format – {{api_service_response.result.body.d.results[0].Name}} where “Name” is the attribute of a Product Entity in Odata Service for Product.
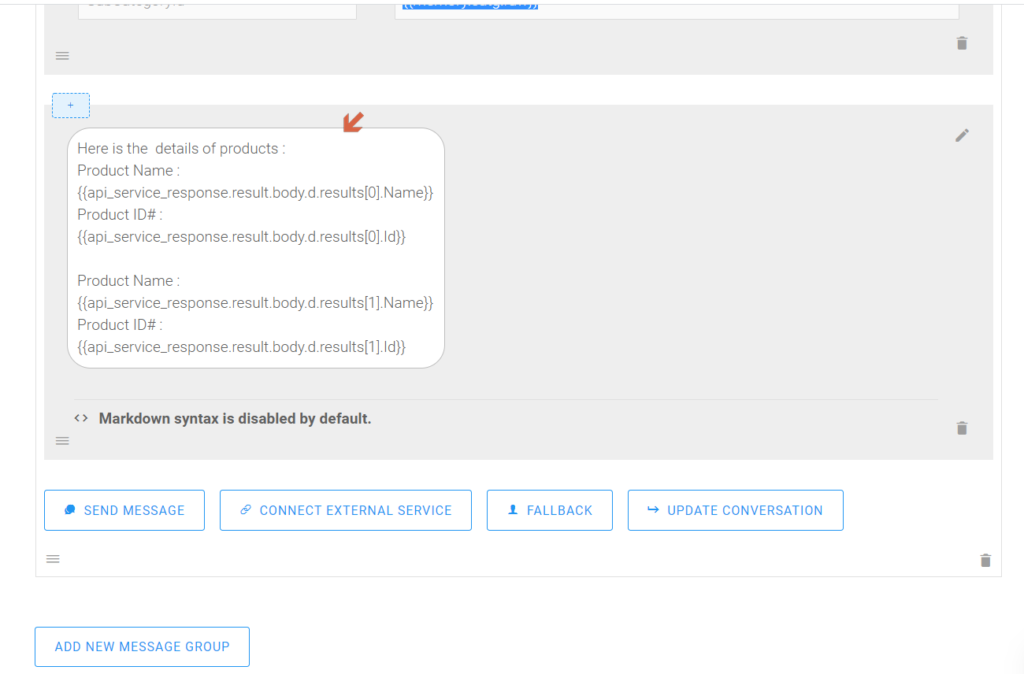
Figure 64—Formulate the response based on service call
Test the chatbot. Type “hi.”
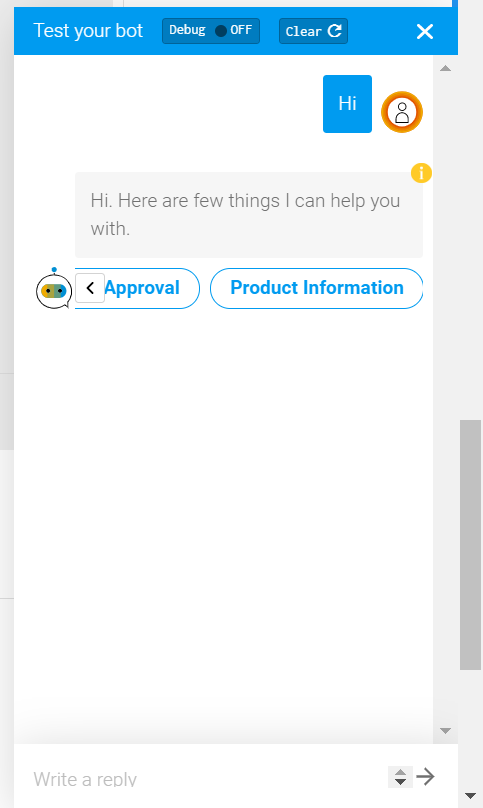
Figure 65—Test product information skill
Select product information and product category.
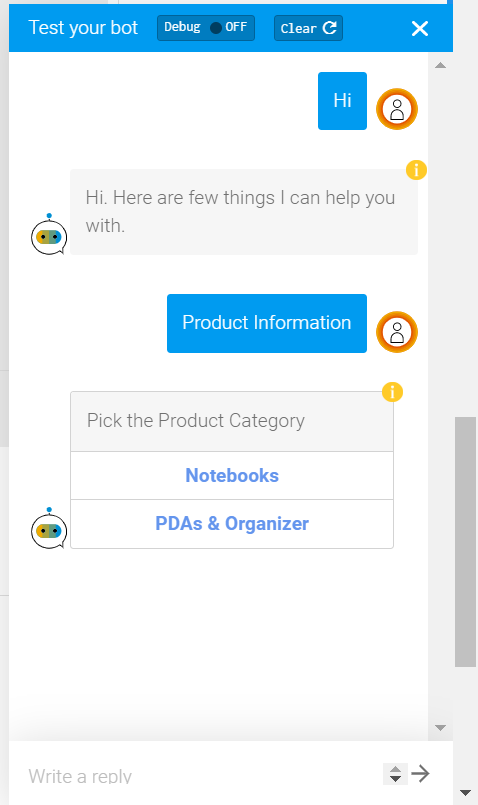
Figure 66—Chatbot triggers the requirement
Here, the Chatbot answers the first two products.
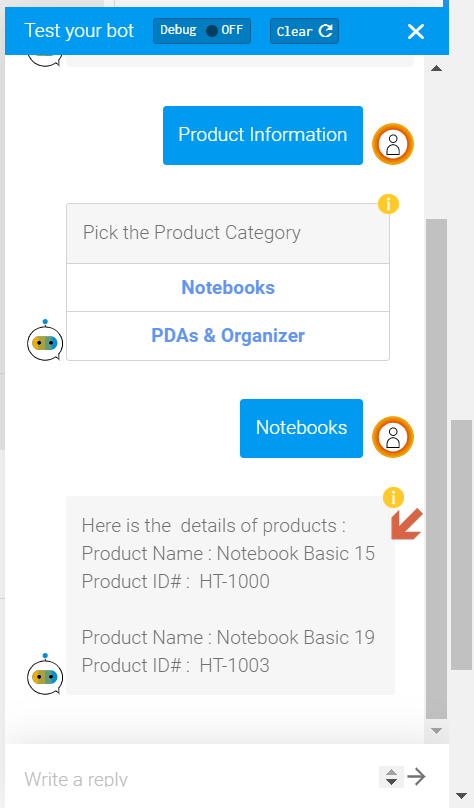
Figure 67—Response with the first two products
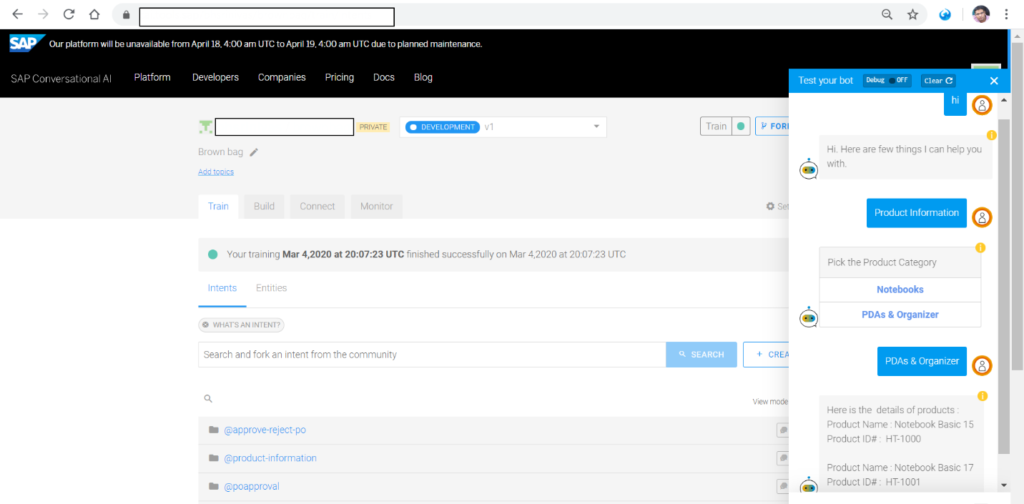
Figure 68—Chatbot is successfully created and tested